Battery Won't Charge (Laptop/Desktop)
Issue [Battery Won't Charge (Laptop) ]
Devices [Laptop, MacOS, Windows]
Suggested Resolutions [See Steps Below]
Windows 10:
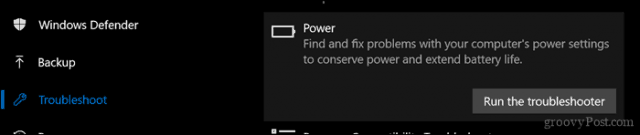
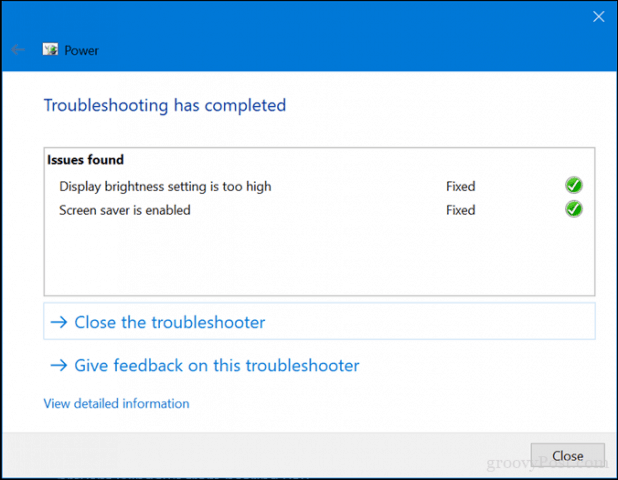
Step 1: Run Windows 10 Battery Diagnostics
If your battery isn’t fully charging, the first thing you can try is the Battery troubleshooter in Windows 10.
- Open Start > Settings > Update & security > Troubleshoot
- Scroll down then click Power
- Click Run the troubleshooter
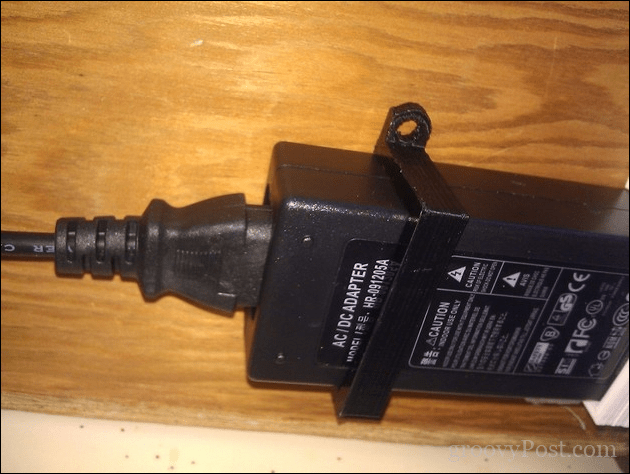
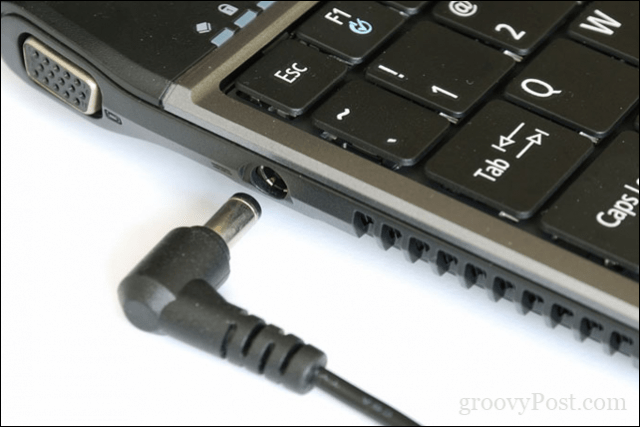
Step 2: Check if Your AC Power Supply is Properly Connected
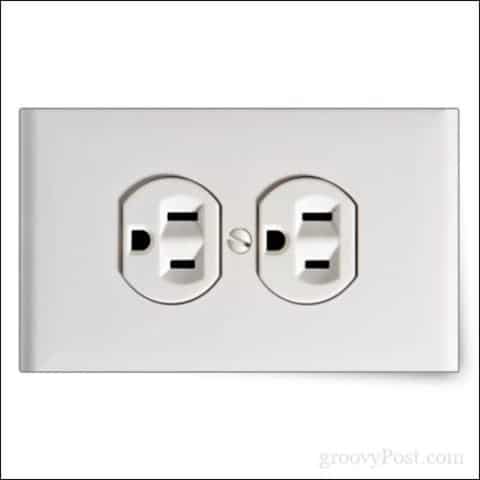
Step 3: Try a Different Wall Outlet and Check for Low Voltage and Electrical Issues
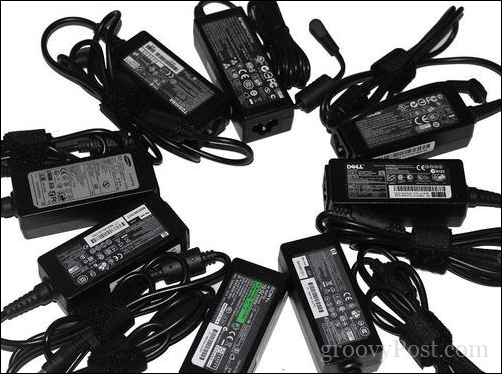
Step 4: Test with Another Charger
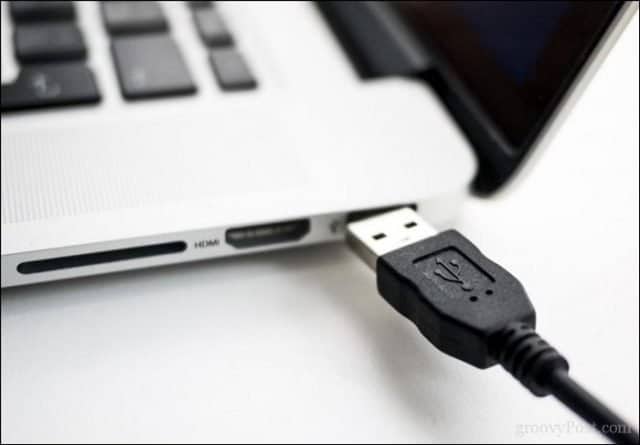
Step 5: Remove all External Devices
Step 6: Check Your Connectors for Dirt or Damage
Step 7: Check for BIOS and Chipset Driver Updates
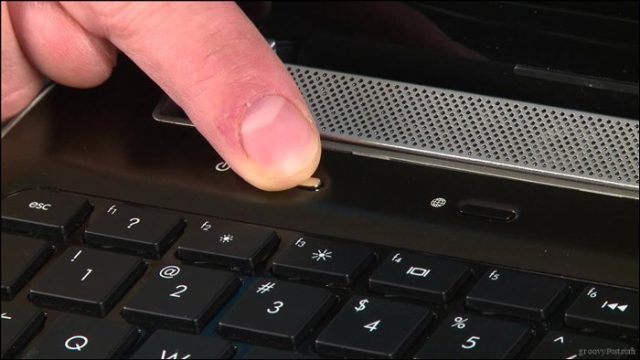
Step 8: Press and Release Power Button Reset
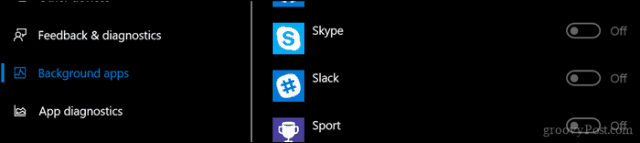
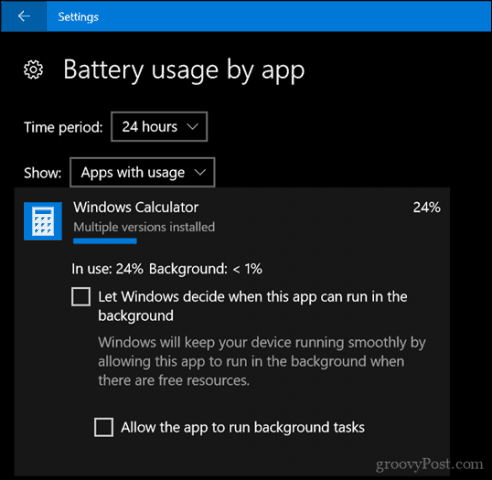
Step 9: Disable Apps and Check Battery Usage in Windows 10
Step 10: Replace Charger or Battery Module
Windows 11:
Step 1: Check the Battery Adapter
- Power Off the laptop.
- Disconnect the adapter from the plug or power outlet.
- Check the cable connection for any torn marks, abnormal changes due to burning.
- If the adaptor seems wet or moist, it might come in contact with water and cause a short circuit. In that case, take it to the repair center and carry out the megger test. If it is surely grounded, replacement is only the way out.
- If no physical changes are visible, open the laptop battery and connect the adapter to the device. If an electrical connection is found working without battery, the problem is with battery and you have to replace it to fix the problem.
Step 2: Ensure the Charging Port is Not Defective
Sometimes charging port can be defective as well and you may experience Windows 11 battery not fully charging issue for that. A laptop, once strongly hit by something or fallen on the ground from a height, hardware issues will be there mostly. The charging port might be loose to hold the pin properly and a loose connection will prevent charging the laptop.
To be sure about this issue, you can check the charging port for any physical damage. Connecting the charger to another laptop of the same brand may also confirm the functionality of the charger. If the port is a problem, contact with repair center for a perfect fix and resolve the problem.
Step 3: Run Windows Power Troubleshooter
- Press Windows key and I.
- On the right-side pane, click on – Troubleshoot.
- Select – Other troubleshooters on the next window.
- Scroll down to Power on the following page.
- Click – Run
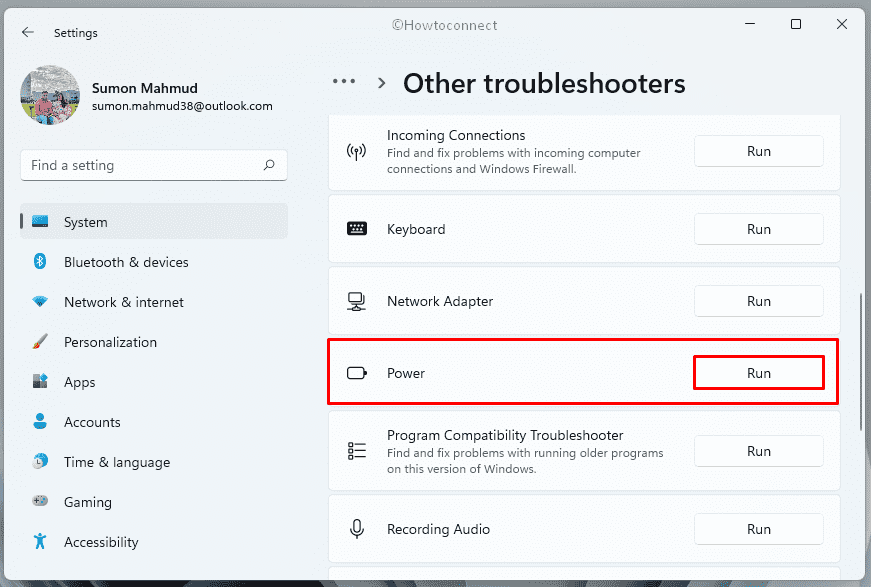
- Follow the on-screen guidelines and complete troubleshooting.
Step 4: Reinstall Windows 11 Battery Driver
- Press – Windows key + X.
- Select – Device Manager.
- When the app opens, double click on – Batteries.
- Right-click – Microsoft ACPI-Compliant Control Method Battery.
- Choose – Update driver.
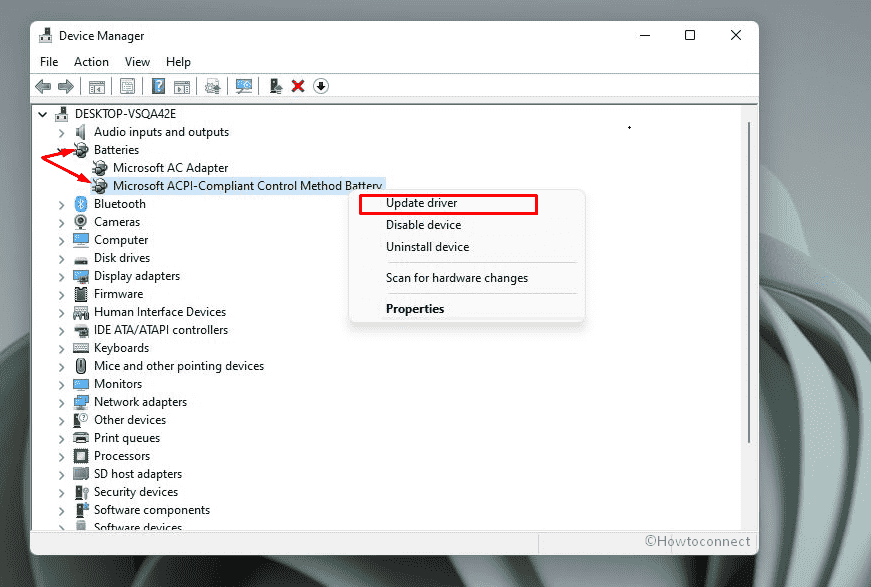
- From the next window, select – Search automatically for drivers.
- After Windows finds a suitable battery driver for you, it will install the update from the manufacturer’s website.
Step 5: Uninstall Microsoft ACPI-Compliant Control Method Battery Device
- Open Device Manager.
- Double click on Batteries.
- Right-click Microsoft ACPI-Compliant Control Method Battery and choose – Uninstall device.
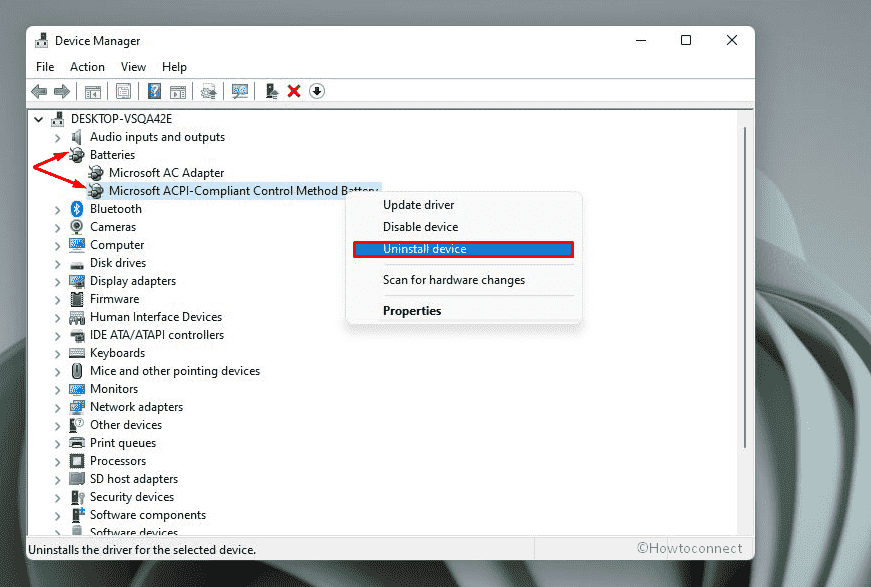
- From the confirmation dialog box, click – Uninstall.
- Restart the laptop to make the changes effective.
Step 6: Update Microsoft AC Adapter Driver
- Right-click on the Start button.
- Click on – Device Manager.
- Once the Windows tool appears, double click on – Batteries.
- Right-click on – Microsoft AC adapter.
- Select – Update driver.
- From a wizard that prompts, click on – Search automatically for drivers.
- Restart the PC and see if the problem is solved.
- If the issue still persists then again launch the Device Manager.
- Expand ‘Batteries’ by double-clicking on it.
- Right click on – Microsoft AC adapter.
- Select – Uninstall device.
- On the prompt, click on – Uninstall.
- Reboot the system
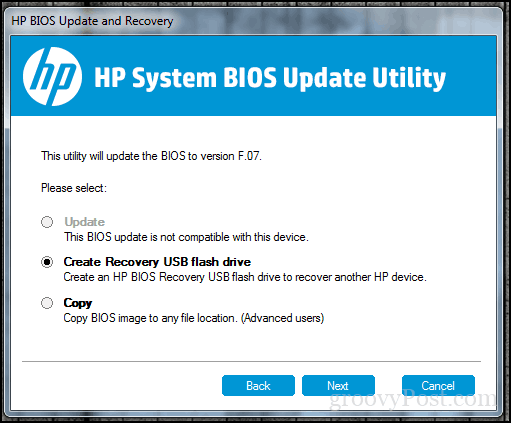
Step 7: Update the BIOS
- Press – Windows + R keys.
- Type – msinfo32.
- Hit Enter.
- When System Information window appears, click the text field present next to Find what.
- Type – BIOS Version and click – Find.
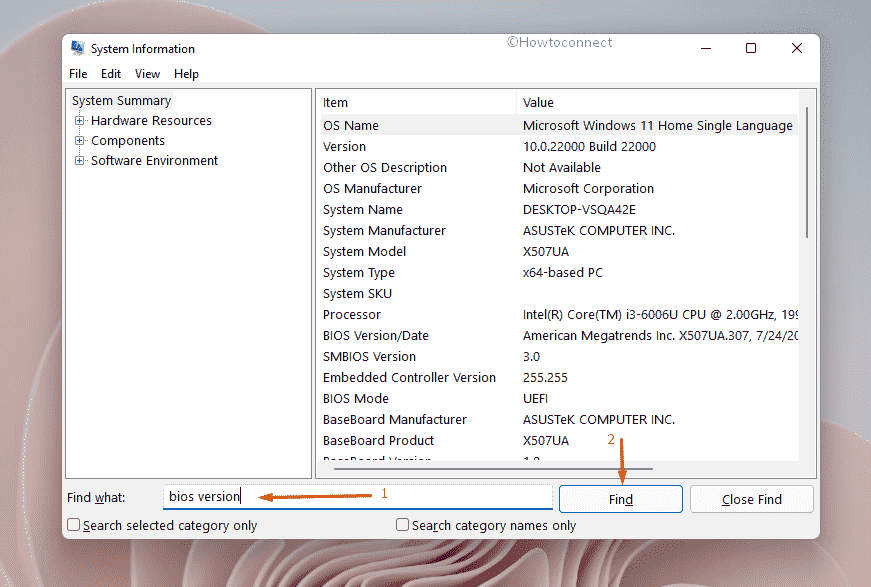
- Once you see the highlighted result, take a note of the BIOS version.
- Open a web browser and navigate to the manufacturer’s website for BIOS.
- Look for suitable versions of BIOS using the info you have noted.
- Download and install once found.
- After completing the process successfully, restart Windows 11.
Step 8: Change the Charging Type to Standard from Adaptive
- Completely Shut down the laptop.
- Turn it on and press Esc or Del.
- From the next screen, enter the BIOS by choosing the option out there.
- On the BIOS, go Advanced.
- Select – Battery charge configuration.
- From the Options, select Standard and Save it.
Step 9: Install Windows Update
- Click on – Search.
- Type – Updates.
- Press – Enter.
- Click on – Check for updates.
- Once any update is downloaded click on Restart now after you are asked.
Step 10: Uninstall Windows Update
- Press – Winkey + I.
- Select Windows Update from the left pane of Settings.
- Go to the right, click on – Update history.
- Move down on the next page and click on – Uninstall updates.
- Now, click on Uninstall link.
Step 11: Drain the Battery Fully and Put it to Charge
Step 12: Cool Down the Battery
Sometimes laptop becomes really hot to get fully charged and end up triggering Windows 11 battery not charging to 100 percent problem. This is how overheating affects your laptop battery and damages it easily.
What you have to do is, detach the battery from the laptop and leave it for a few hours until it gets cold. Insert the battery with the device and put the same to charging. Hope this will fix the issue.
Step 13: Remove the Battery and Reinsert
here is a feasible fix to get the battery charging again is to remove the battery and then reinsert it. For this, power off the device and remove the battery unlocking the sliding pin from the laptop. Wait for a couple of minutes and then connect the battery with the machine and put the same to charging. Try checking the battery integrity after you have removed it and also the wear level.
Try to connect the laptop with an active power source after removing the battery. This will confirm whether the issue is with the battery or the adapter is the one causing trouble. Replace the defective one if required based on the detected fault.
Step 14: Clean the connection ends properly
Some users have claimed that Windows 11 battery not charging problem occurs from very simple causes like accumulation of dust on the adaptor as well as connectors. Therefore, you must keep these precise things clean always, keep them covered as possible and never let moisture come in contact.
There are some alcohol sobbed pads for cleaning available in the stores, you can use them for this purpose. Rubbing alcohol or electric cleaning chemicals can be used but do not spray directly in the contact point. Cotton or lint-free cloth can be handy to clean the dirt and accumulated dust powder. Make sure to disconnect the device from the power source before cleaning to avoid any mishappening. Once the adaptor and the connectors are completely clean, you can expect the charging will start again.
Step 15: Connect the Charger to the Direct Power Source
Many of us use a multi-plug or extension cable in order to charge the laptop instead of connecting to a direct power source. This is because the charging points are not always in a convenient place or the workstation is a shared one.
However, these cables or the plug used for ease of access can often be faulty and you may have Windows 11 battery not charging problem. Try avoiding these extensions if possible and connect the charger directly to the power plug. If you have to use it, buy good quality one to avoid charging issues afterward.
macOS:
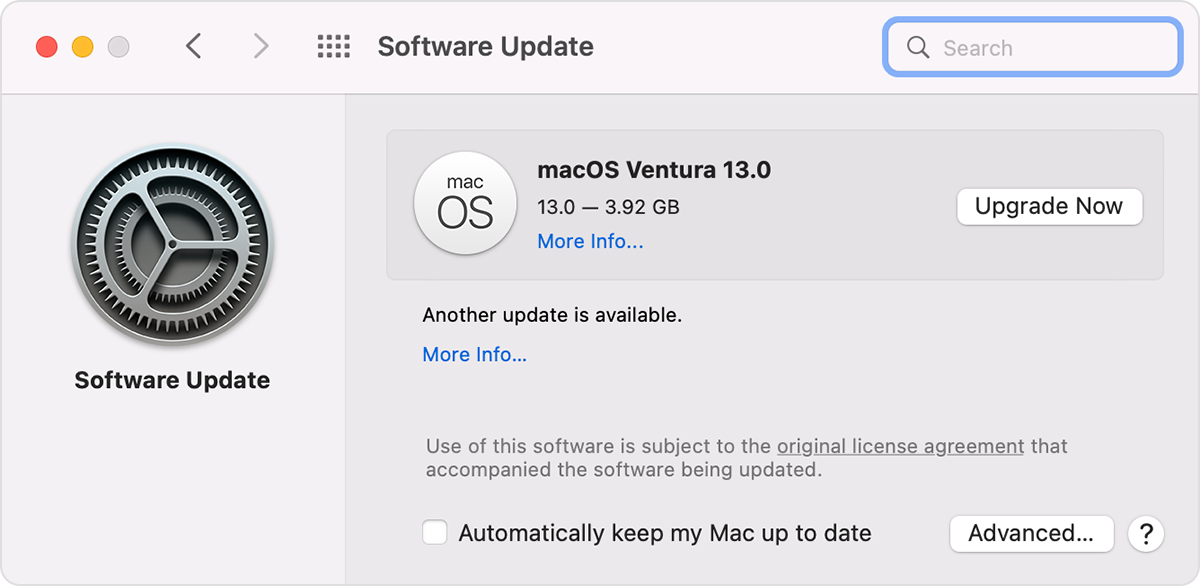
Step 1: Update the Software and Firmware
- From the Apple menu in the corner of your screen, choose System Settings or System Preferences.
- If you chose System Settings, click General on the left side of the window. Then click Software Update on the right.
- If you chose System Preferences, click Software Update in the window.
- Software Update then checks for new software.
- If Software Update finds new software, click the button to install it. The button might be named Update Now, Upgrade Now, Install Now, or Restart Now, for example. You might then be asked to enter your administrator password.
- If Software Update says that your Mac is up to date, then no new software is currently available for your Mac model. Software Update shows only software that is compatible with your Mac.
Step 2: Reset the SMC
Before resetting the SMC, follow these steps:
- Shut down your Mac, if possible.
- Press and hold the power button for 10 seconds, then release the button.
Every Mac has a power button. On laptop computers that have Touch ID, press and hold Touch ID. - Wait a few seconds, then press the power button to turn on your Mac.
If the issue persists, reset the SMC:
- Shut down your Mac.
- On your built-in keyboard, press and hold all of the following keys. Your Mac might turn on.
- Control
 on the left side of your keyboard
 - Option (Alt)
 on the left side of your keyboard
 - Shift
 on the right side of your keyboard
- Control
- Keep holding all three keys for 7 seconds, then press and hold the power button as well. If your Mac is on, it will turn off as you hold the keys.
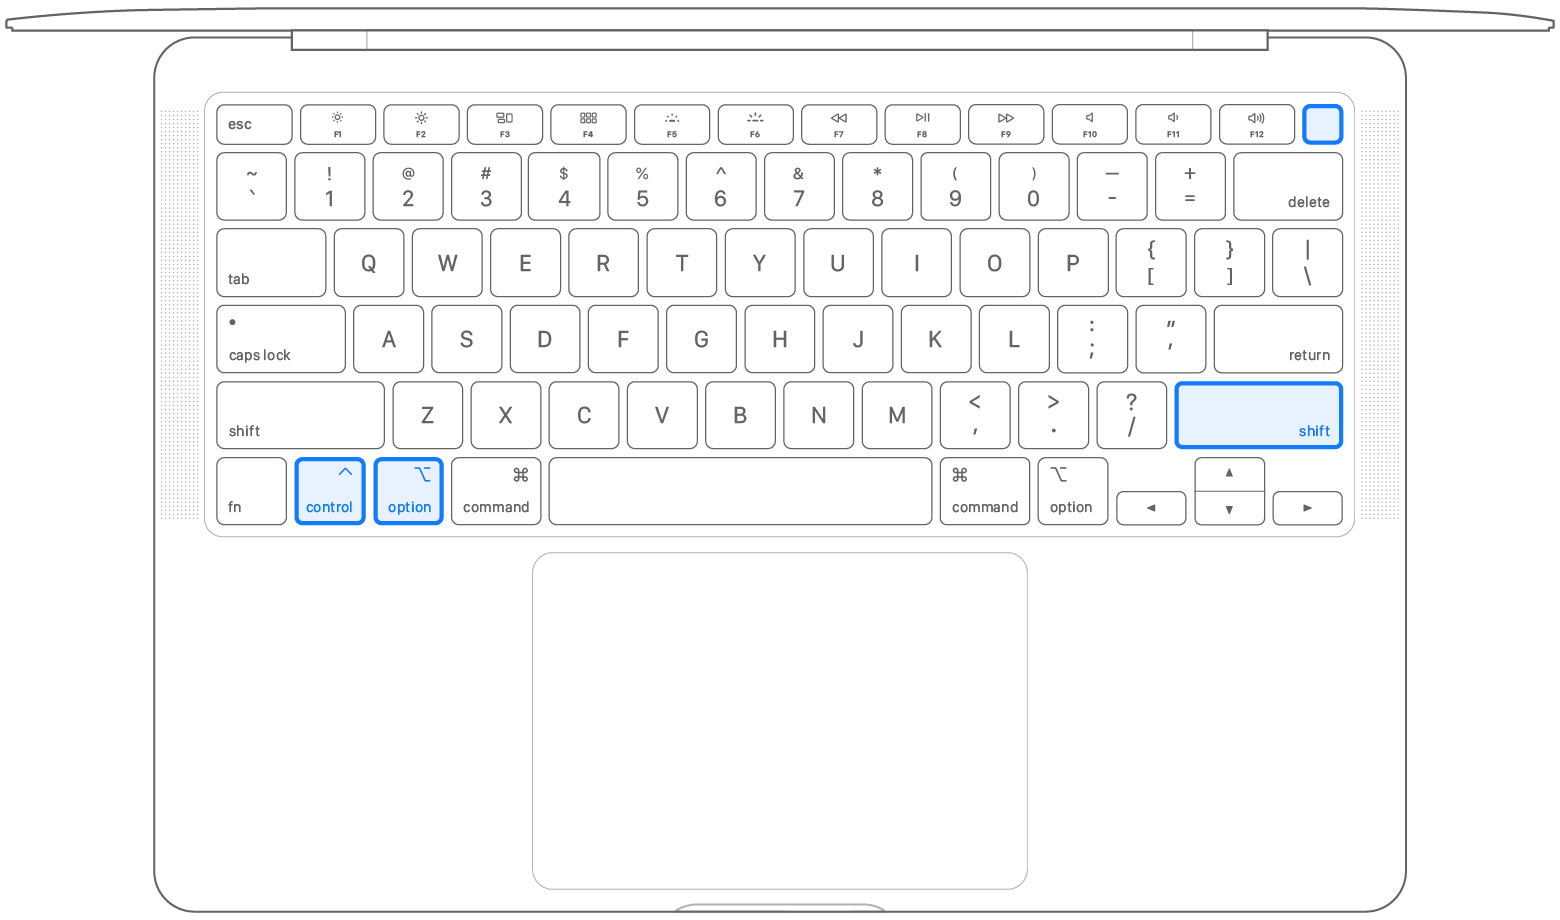
- Keep holding all four keys for another 7 seconds, then release them.
- Wait a few seconds, then press the power button to turn on your Mac.
If your Mac isn't a laptop computer, follow these steps:
- Shut down your Mac, then unplug the power cord.
- Wait 15 seconds, then plug the power cord back in.
- Wait 5 seconds, then press the power button to turn on your Mac.
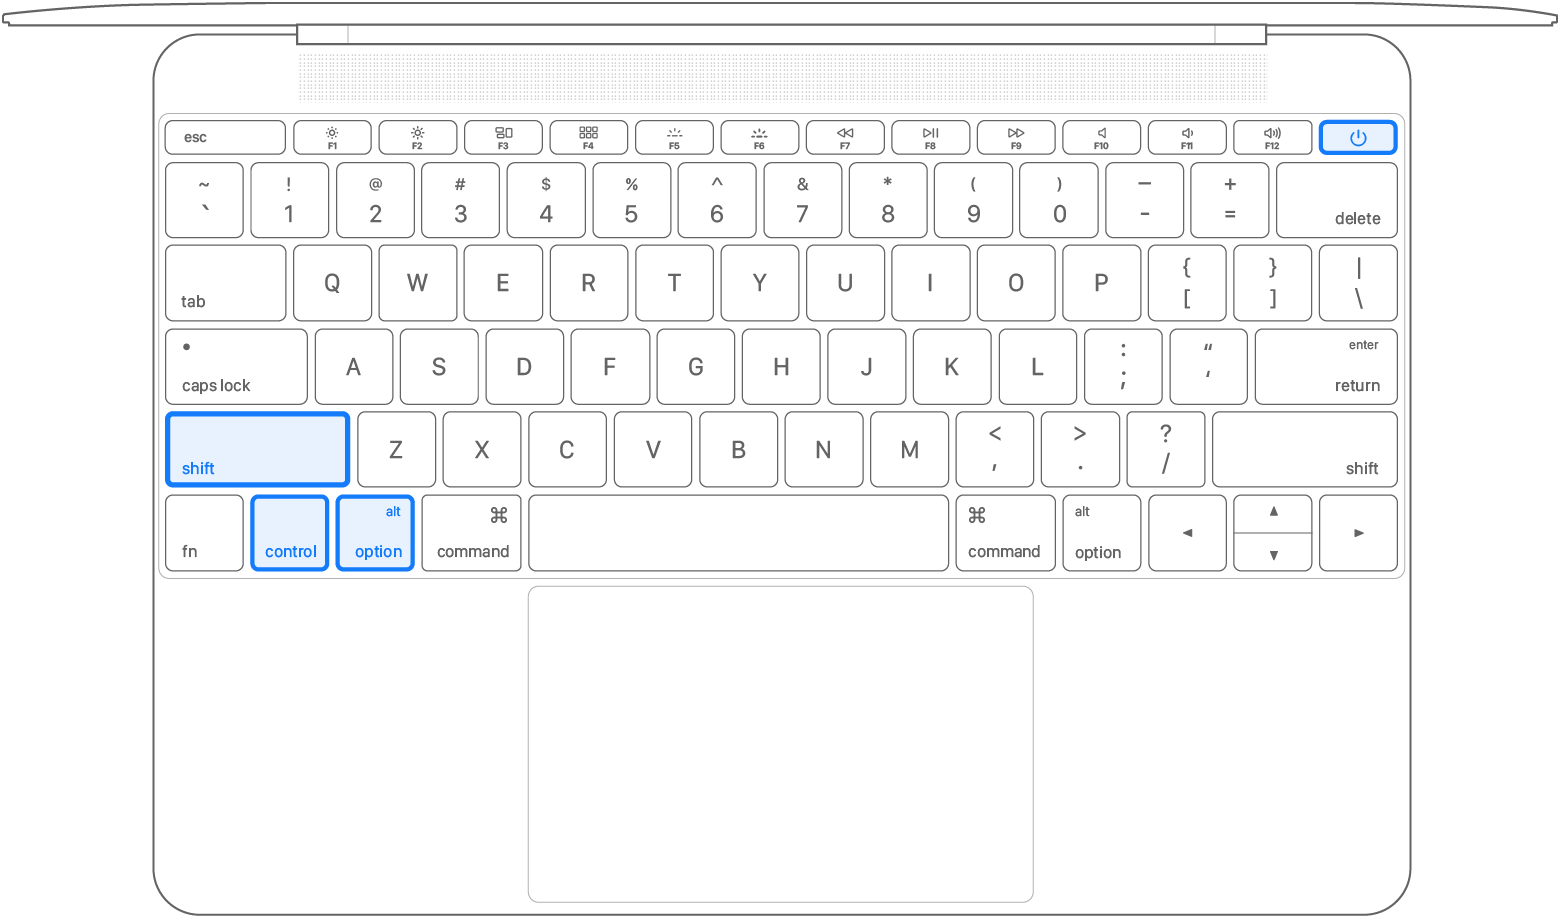
Follow these steps on older computers that have neither Apple silicon nor the Apple T2 Security Chip.
- Shut down your Mac.
- On your built-in keyboard, press and hold all of these keys:
- Shift on the left side of your keyboard
- Control on the left side of your keyboard
- Option (Alt) on the left side of your keyboard
- Shift
- While holding all three keys, press and hold the power button as well.
If your Mac isn't a laptop computer, follow these steps:
- Shut down your Mac, then unplug the power cord.
- Wait 15 seconds, then plug the power cord back in.
- Wait 5 seconds, then press the power button to turn on your Mac
Step 3: Turn off Battery Health Features
Step 4: Check the Battery Condition
Step 5: Inspect the Hardware
Step 6: Let it Cool Down
Step 7: Clean the Port
Step 8: Use a Different Cable
Step 9: Use a Different Power Adapter
Step 10: Use a Different AC Wall Adapter
Step 11: Use a Different Power Outlet
Step 12: Check for Line Noise
Step 13: Leave it Plugged in for a While
Step 14: Run Diagnostics
Step 15: Get your Mac Serviced
ChromeOS:
Step 1: Perform a Visual Inspection
If the Chromebook is not charging, check for damage to the charging port or for signs of oxidation. In addition, check for a crack in the display or for other signs of physical damage to the laptop.
The Chromebook is damaged: Contact HP to replace the damaged part or unit. To check the warranty for your computer, go to HP Customer Support.
The Chromebook is not damaged: Proceed to the next step.
Step 2: Verify Power to the Computer
Ensure that the computer is connected to working power.
Step 3: Verify the Battery Charging Status
The Chromebook not charging might indicate that the battery is in a deep discharge state. Although the battery indicator light is off, a smaller than normal charge current is being sent. Charge the laptop for at least 10 minutes, or for up to 24 hours.
When a Chromebook is used for the first time, if a white LED near the AC power connector blinks, the battery is still in shipping mode. Turn off the notebook, connect the AC adapter, allow the battery to charge for at least 30 minutes, and then start the computer.
For information about battery tests, see HP Chromebooks and HP Chromebases - HP Support Assistant for Chrome operating system.
If the Chromebook turns on, it is performing normally. Leave the laptop connected to the AC adapter until it is fully charged. You can check if the battery is charging in the lower-right status area of the screen.
If the Chromebook won’t turn on, periodically press the power button. In some cases, it can take up to 24 hours for the battery to charge.
If the device does not turn on after 24 hours of charging, contact HP to replace the damaged part or unit. To check the warranty of your computer, go to HP Customer Support.
If the battery indicator light above the AC power connector turns on, you can use the color to identify the issue.
Battery indicator light color | Battery indicator light status and action |
|---|---|
Green or white | The remaining capacity is 94% or higher, or the charger is initializing (15 seconds after plugging in the AC adapter). Wait 15 seconds, then turn on the computer and allow it to charge fully. |
Amber | The remaining capacity is 94% or lower. Charge for up to 24 hours, periodically attempting to turn on the computer. If the device does not turn on after 24 hours of charging, contact HP to replace the damaged part or computer. To check the warranty of your computer, go to HP Customer Support. |
Red | The computer cannot communicate with the battery. Contact HP to replace the damaged part or computer. To check the warranty of your computer, go to HP Customer Support. |
Step 4: Perform a Hard Reset
A hard or forced reset erases all information in the computer memory. This forces the system to clear and re-establish the software connections between the BIOS and the hardware.
A hard reset does not remove any local files or settings.
Turn off the computer.
Press and hold Refresh
, and then press Power
while continuing to hold Refresh
After the Chromebook turns on, release Refresh
If a hard reset does not resolve the issue, contact HP support to replace the damaged part or computer. To check the warranty for your computer, go to HP Customer Support.
External Websites/Sources
Related Articles
Battery Wont Charge (iOS, Android)
Battery Won't Charge (iOS, Android) Issue [Battery Wont Charge (iOS, Android) ] Devices [Android, iOS] Suggested Resolutions [See Steps Below] iOS: Step 1: Check Your Charging Cable and USB Adapter for Signs of Damage Breakage or bent prongs are ...Computer Running Hot
Computer Running Hot Issue [Computer Running Hot] Devices [Windows, MacOS, Chrome OS] Suggested Resolutions [See Steps Below] Windows: Step 1: Check That the Fans Are Working Internal PC components generate a lot of heat, especially when you use your ...Windows Won't Boot
Issue [Windows Won't Boot] Devices [Laptop, Desktop, Windows] Suggested Resolutions [See Steps Below] Windows 10: Step 1: Check the Power Supply When pressing the power button on your PC, the fans spin up, indicator lights on the keyboard and ...Computer Making Strange Noises
Issue [Computer Making Strange Noises] Devices [Laptop, Desktop, Windows, MacOS, MacBook ] Suggested Resolutions [See Steps Below] 7 Reasons a computer is buzzing & how to fix it A buzzing noise coming from your computer is generally a sign of ...Computer Wont Recognize USB Device
Issue [Computer Won't Recognize USB Device] Devices [Laptop, Desktop, Windows, MacOS, Chrome OS] Suggested Resolutions [See Steps Below] Chromebook -Some USB drivers have a power switch on them. So, make sure it is not switched off position. -If you ...