Computer Wont Recognize USB Device
Issue [Computer Won't Recognize USB Device]
Devices [Laptop, Desktop, Windows, MacOS, Chrome OS]
Suggested Resolutions [See Steps Below]
Chromebook
Restart your Chromebook
Here’s how to restart your Chromebook:
- Unplug the USB stick from your Chromebook.
- Click on the clock in the taskbar (bottom right corner).
- Click on the Power icon. This will shut down your Chromebook.
- Now turn on your Chromebook again using the power button.
Once your Chromebook restarts, connect the USB flash drive to it again. If it doesn’t work, continue reading.
Try a Different Port or Computer
To confirm if the USB port on your Chromebook is faulty, unplug the USB stick from the current port and try plugging it into a different port or different computer.
If it connects, the USB port on your Chromebook is the culprit.
Format the USB Drive
If your USB drive is formatted in NTFS format, it won’t work on Chromebook. This is because Chromebook does not recognize this format.
So, make sure that your USB stick is formatted in FAT format. To do that, connect it to any Windows computer, and follow the below-mentioned steps:
- Open Explorer.
- Right-click on the USB drive and select Format from the context menu.
- In the File System option, choose Fat32.
- Click on the Format button.
Update ChromeOS
Lastly, if your USB drive is not faulty and ports are also functioning, try updating your Chrome OS.
To update your Chromebook, follow these steps:
- Click on time at the bottom right corner of the taskbar and select Settings.
- Click on About ChromeOS.
- Click on Check for Updates.
If any new update is available, your Chromebook will install them.
MAC
0 Turn It Off and On Again
A simple restart can solve surprisingly many problems, and it takes just a few clicks and a minute or two of your time:
- Click the Apple icon in the top-left corner.
- Select the Restart option.
- Make sure the Reopen windows when logging back in checkbox isn’t ticked.
- Click Restart to confirm.
- Wait for your Mac to restart.
Once your Mac is done booting up, try accessing your USB flash drive again. Hopefully, this simple fix will be all it takes to get it to work.
1 Physical Connectivity Issues
The first thing to check if your thumb drive is not showing up on a Mac is if the problem is with the particular USB port that you are using. At the risk of stating the obvious, your first move should be to try the device in an alternate USB port available on your machine.
If the device works in the second port it indicates that the first port may be damaged and may need to be replaced or repaired. However, if the drive doesn’t work in any of your USB interfaces you need to look further to determine the problem.
If another Mac is available, try connecting the flash drive to it in order to verify that the USB drive itself is not the culprit. If it will not work on different Macs then it is likely that there is a major issue with the device.
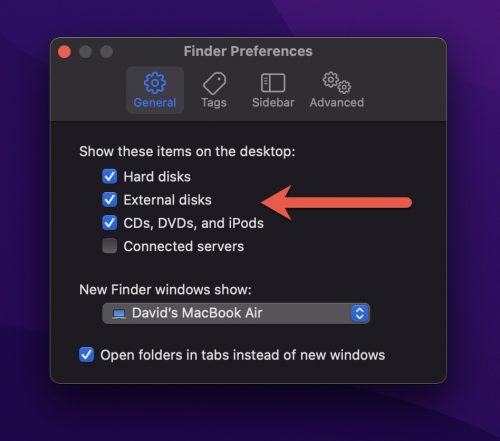
2 Check Finder Preferences
It’s possible that your USB flash drive is recognized by your Mac just fine but isn’t showing up because certain specific Finder settings have been changed. Here’s what you need to do to fix them:
- Open Finder and click the Finder menu.
- Select Preferences (Command + ,)
- Go to the General tab (Finder > Preferences > General) and make sure the External disks item is selected.
- Go to the Sidebar tab and make sure the External disks location is selected.
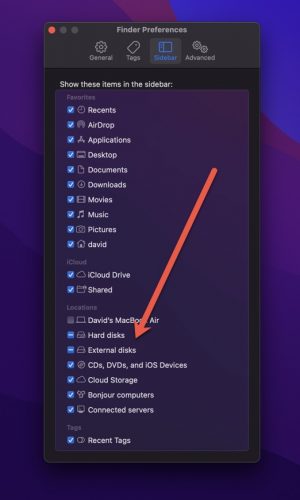
- Close the Preferences window.
Your USB flash drive should now be listed as a location in Finder and displayed as an icon on your Desktop.
3 Insufficient Power
Your flash drive may not be registering with your Mac due to an issue of insufficient power. This is especially prone to happen if you use a bus-powered USB hub and have multiple devices connected simultaneously. Your Mac or MacBook may not be supplying enough power to adequately service all of the devices.
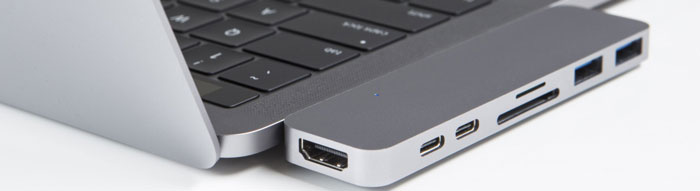
The solution here is to try connecting the flash drive directly to the computer’s USB port or employing a self-powered hub that eliminates the power drain on your machine.
4 Failure to Previously Eject a Drive
If your Mac is having problems identifying a flash drive it may be that you did not properly eject a drive that was previously connected to your machine. Failure to eject a USB drive before pulling it out of the port can cause the OS to view the port’s status incorrectly and may impact its ability to be identified and accessed.
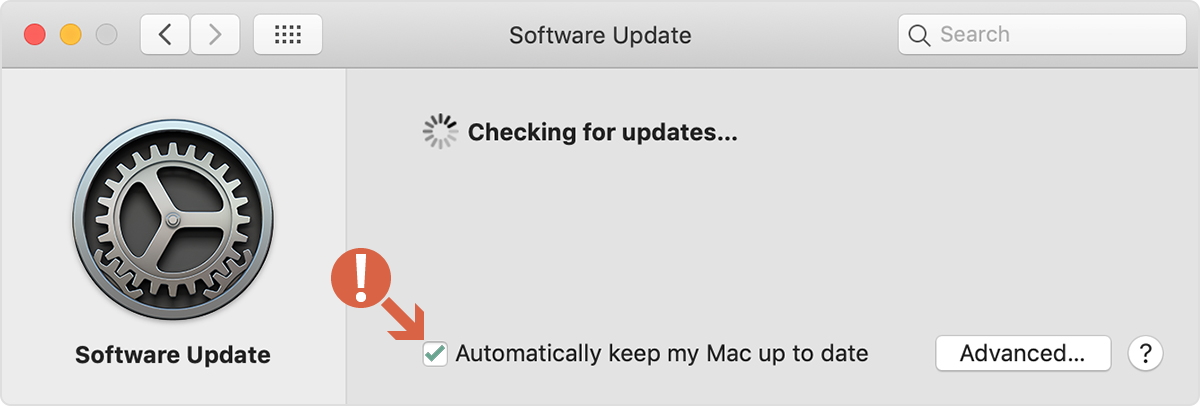
5 Update Your Mac’s OS and Firmware
Checking for updates may be one of the easiest ways to open USB ports on your Mac. Firmware updates address a variety of hardware issues and the functionality of the USB ports could well be one of them.
Keeping your software and firmware up to date is good practice even if you are not experiencing problems. It is an essential step in resolving issues when they arise.
6 Faulty System Configuration
Your system configuration might need to be reset in order to resolve the USB port problem. Here’s how to reset the USB ports on your Mac by resetting two different system components that might be impacting your ability to use the USB ports on your machine.
Reset the System Management Controller (SMC):
- Follow these steps on a Mac:
- Shutdown the machine.
- Disconnect the power cord.
- Press down the power button and hold it for 5 seconds.
- Reconnect the power cord and turn the Mac on.
- Follow these steps on a MacBook:
- Shutdown the MacBook.
- Connect the power cord.
- Hold Shift+Control+Option and the Power button simultaneously.
- Release all the keys at the same time.
- Start the MacBook.
If that does not work you can try resetting the PRAM/NVRAM. The Parameter Ram and the Non-volatile RAM contain information concerning the USB ports on your Mac.
Follow these steps to reset these memory locations:
- Shutdown the computer.
- Restart the machine while holding down Command+Option+P+R.
- Hold down the keys until the screen flashes and you hear a sound.
- Listen for the chime and let the computer boot normally.
7 Use First Aid to Repair the USB Flash Drive
Mac computers come with a useful storage device repair feature called First Aid. You can access this feature from Disk Utility:
- Open Finder and go to Applications.
- Open the Utilities folder and launch Disk Utility.
- Select your USB flash drive from the list of available storage devices on the left.
- Click First Aid in the toolbar.
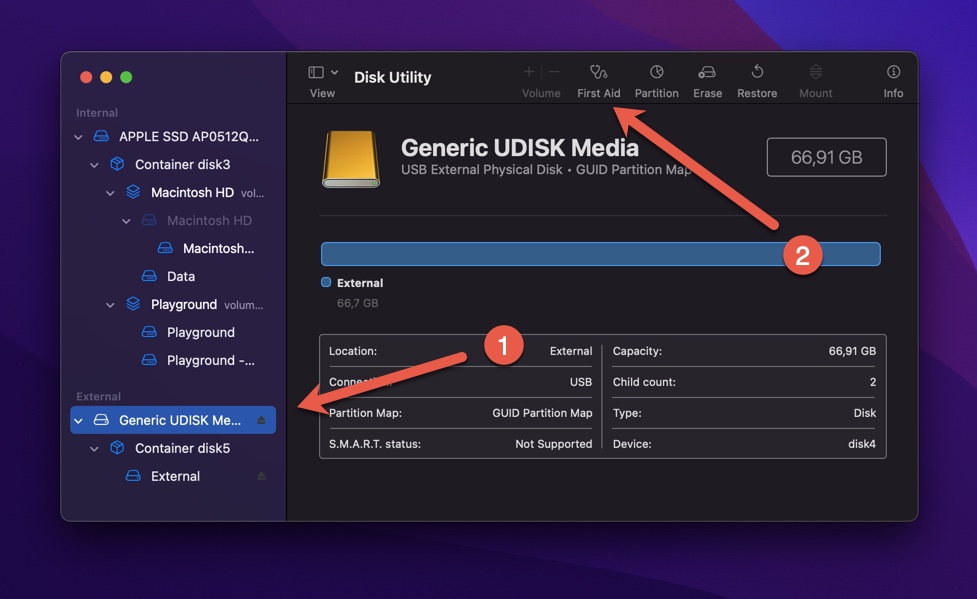
- Confirm that you want to check the USB flash drive for errors by clicking Run.
First Aid will automatically repair all errors and, hopefully, make your USB flash drive usable.
8 View System Information
When diagnosing an inaccessible USB flash drive, it’s useful to view the information your Mac has collected about it. If the information seems off, there’s a chance that the USB flash drive is a poorly made fake:
- Open Finder and go to Applications.
- Open the Utilities folder and launch the System Information tool.
- Select the USB category from the left pane.
- Pick your USB flash drive from the USB device tree.
- Check the displayed information for accuracy.
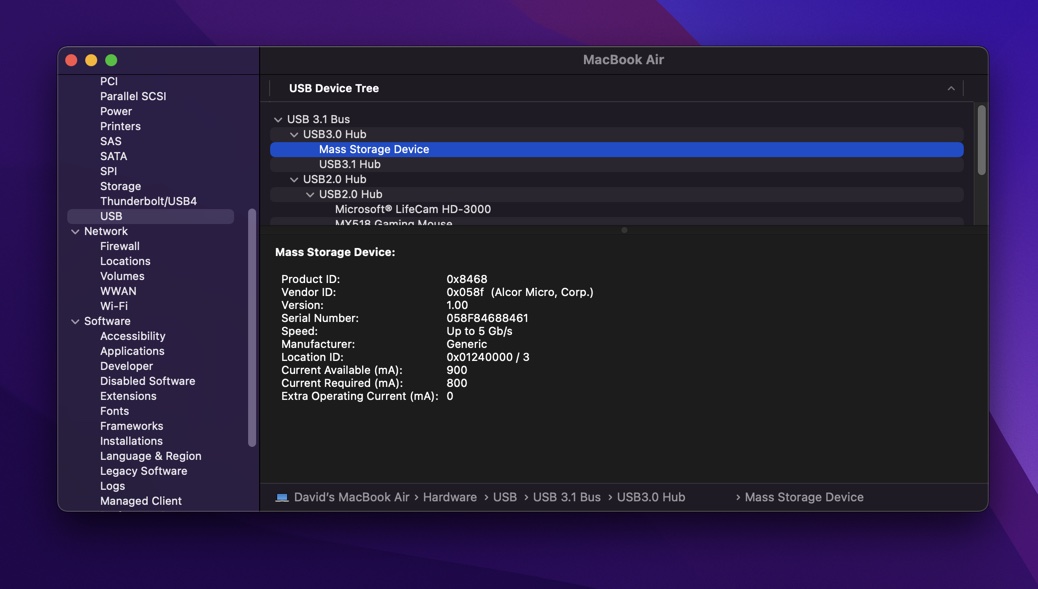
Unfortunately, fake USB flash drives are sold in large numbers these days, and the people who buy them often realize that they’ve been tricked only when they experience the first problems, such as the inability to use the full advertised storage capacity.
9 Change the Drive File System
Modern Macs natively support Apple File System (APFS), Mac OS Extended, MS-DOS (FAT), and exFAT file systems. If your USB flash drive is using, let’s say, NTFS (Windows) or ext3 (Linux), then you should reformat it to change the file system to a supported one. Fortunately, that’s pretty easy to do:
- Open Finder and go to Applications.
- Open the Utilities folder and launch Disk Utility.
- Select your USB flash drive from the list of available storage devices on the left.
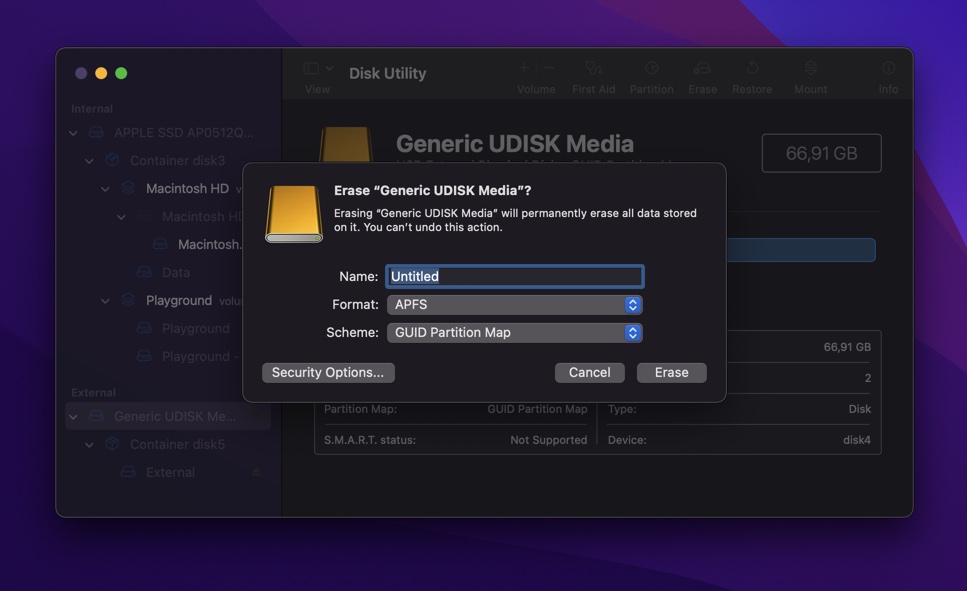
- Click the Erase button.
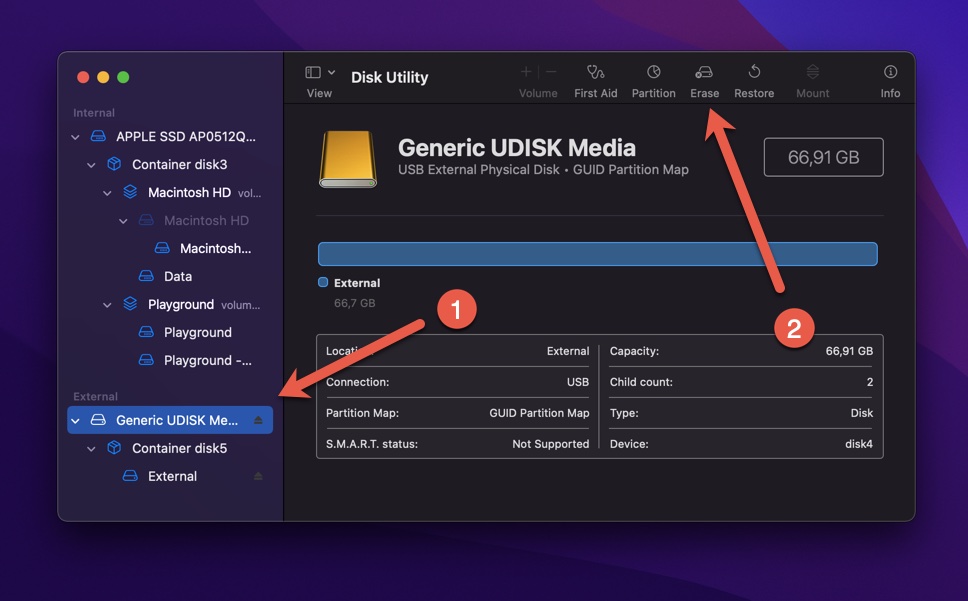
- Give the USB flash drive a descriptive name and change the format settings if you want to (all available options are compatible with macOS).
- Click the Erase button to format the USB flash drive.
Just remember that not all file systems supported by macOS are also supported by Windows and Linux. For the best cross-device compatibility, use FAT or exFAT.
10 Check for Missing Software
Some specialized USB flash drives, such as those with proprietary encryption features, may require special software to be accessible. If you suspect that this could be the case with your USB flash drive, then we recommend you visit the manufacturer’s website and see if you’ve missed some important software.
Recovering Data From a Corrupted or Crashed Flash Drive
It may be that the reason you cannot access the data on the flash drive is due to data corruption. Using data recovery software you can attempt to restore the data if you can get the system to recognize the drive so the recovery software can work on it.
Disk Drill USB drive data recovery software for Mac is an excellent solution that gives you a great chance of recovering your files from a damaged or corrupted drive.
In order to recover data from a flash drive or other USB connected drive using Disk Drill, follow these steps:
- Download and install Disk Drill on your Mac. You can use the free version of the software to determine if your files can be recovered before upgrading to the Pro version of the application.
- Attach the USB or flash drive which contains the data that is to be recovered.
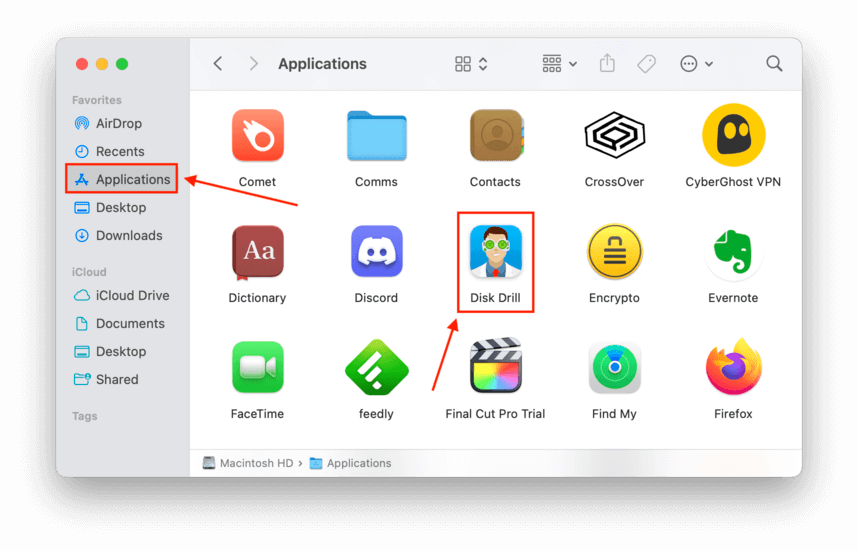
- Launch Disk Drill by opening Finder > Applications and double-clicking its icon.
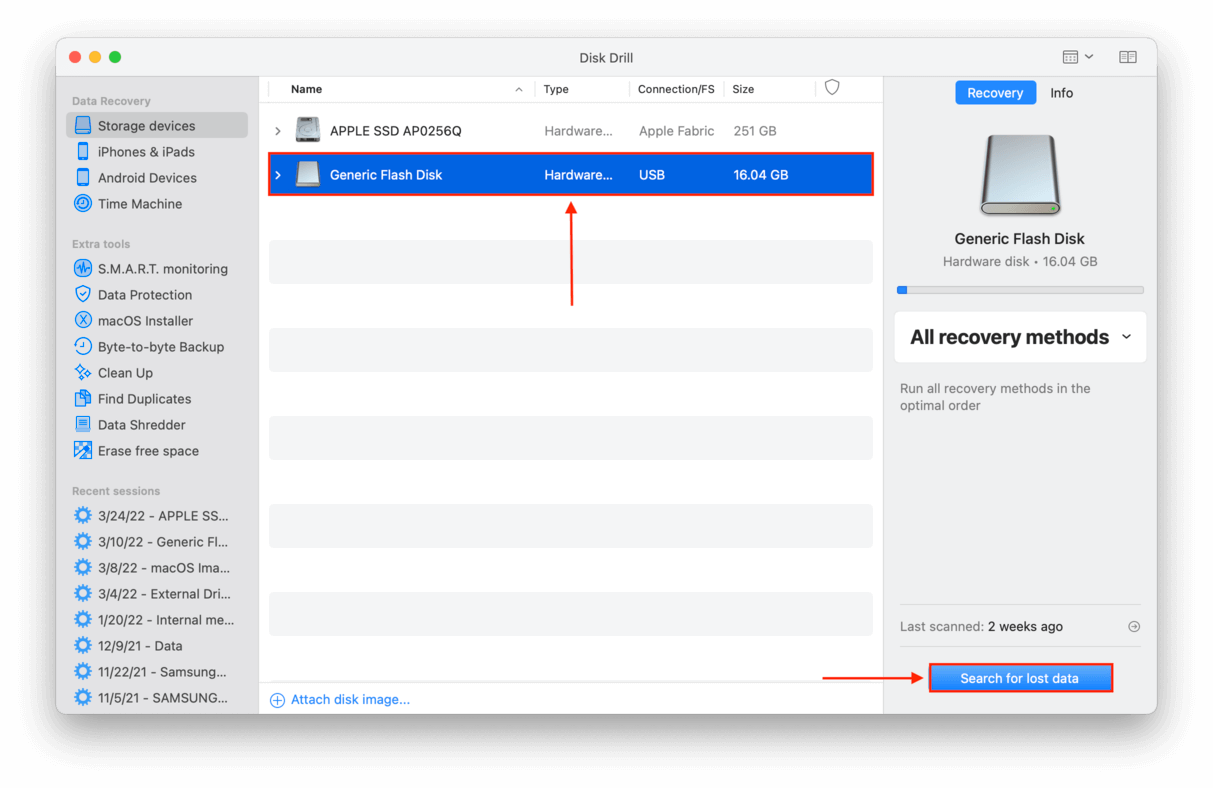
- Select your USB flash drive from the list, then click “Search for lost data.”
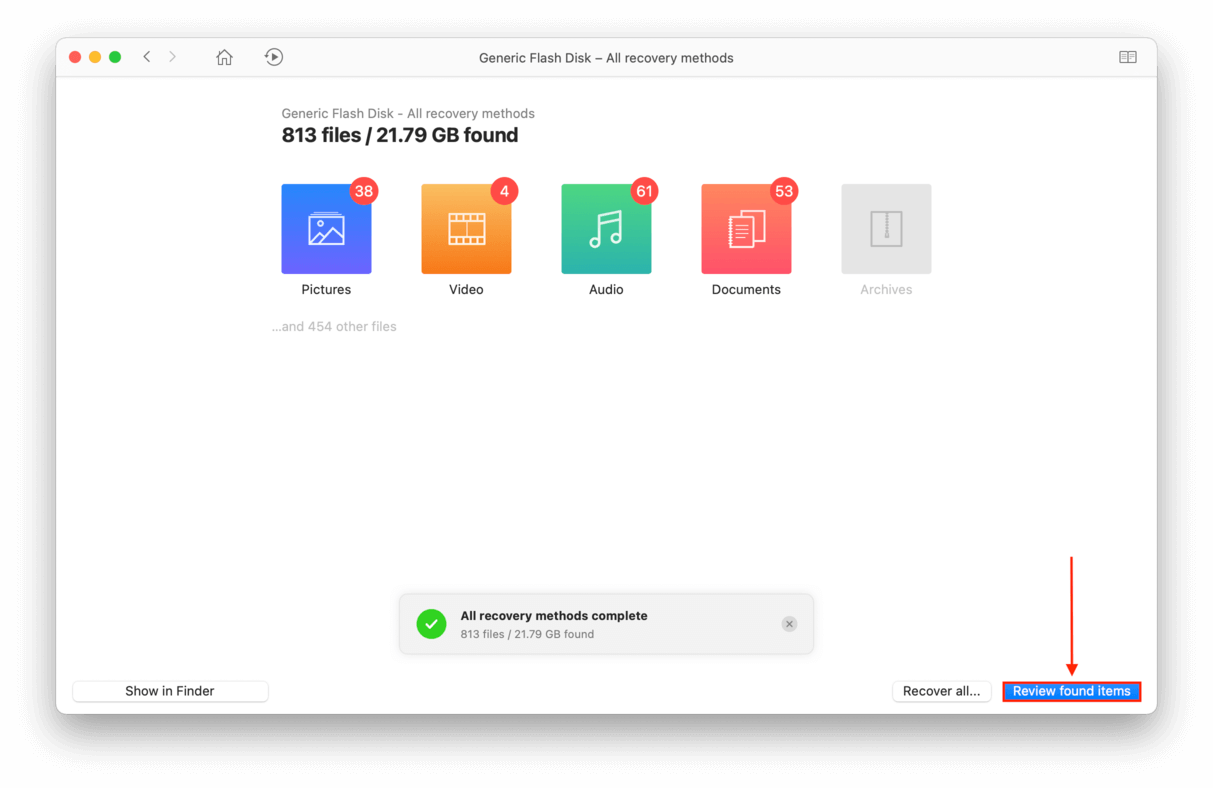
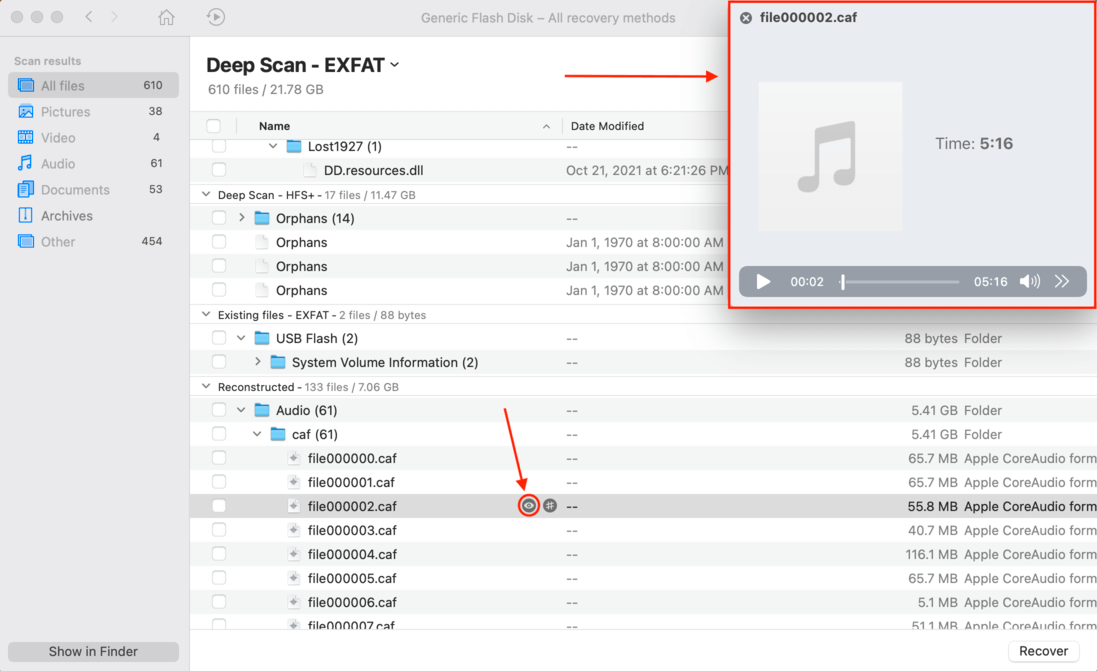
- Wait for Disk Drill to complete its scan, then click “Review found items.”
- Preview your files by hovering your mouse beside their file names and clicking the eye button that appears.
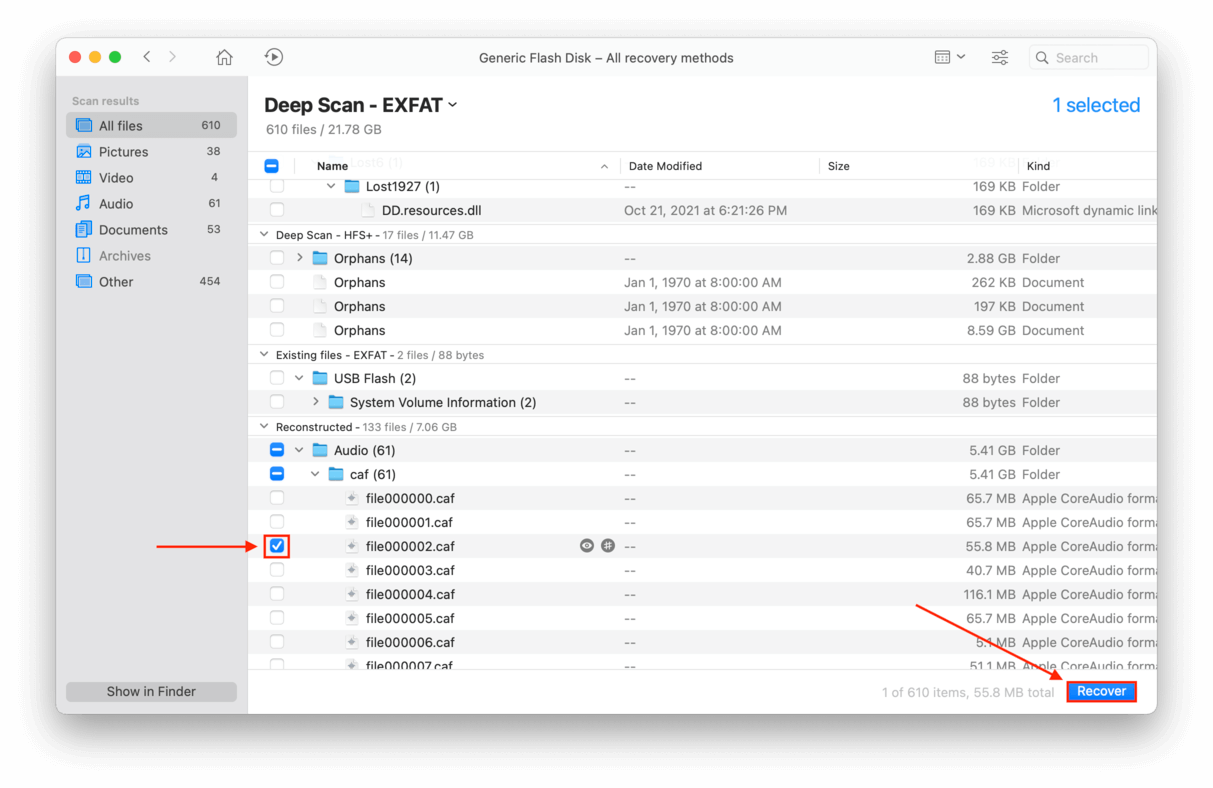
- Use the checkbox column to select the files you want to recover, then click “Recover.”
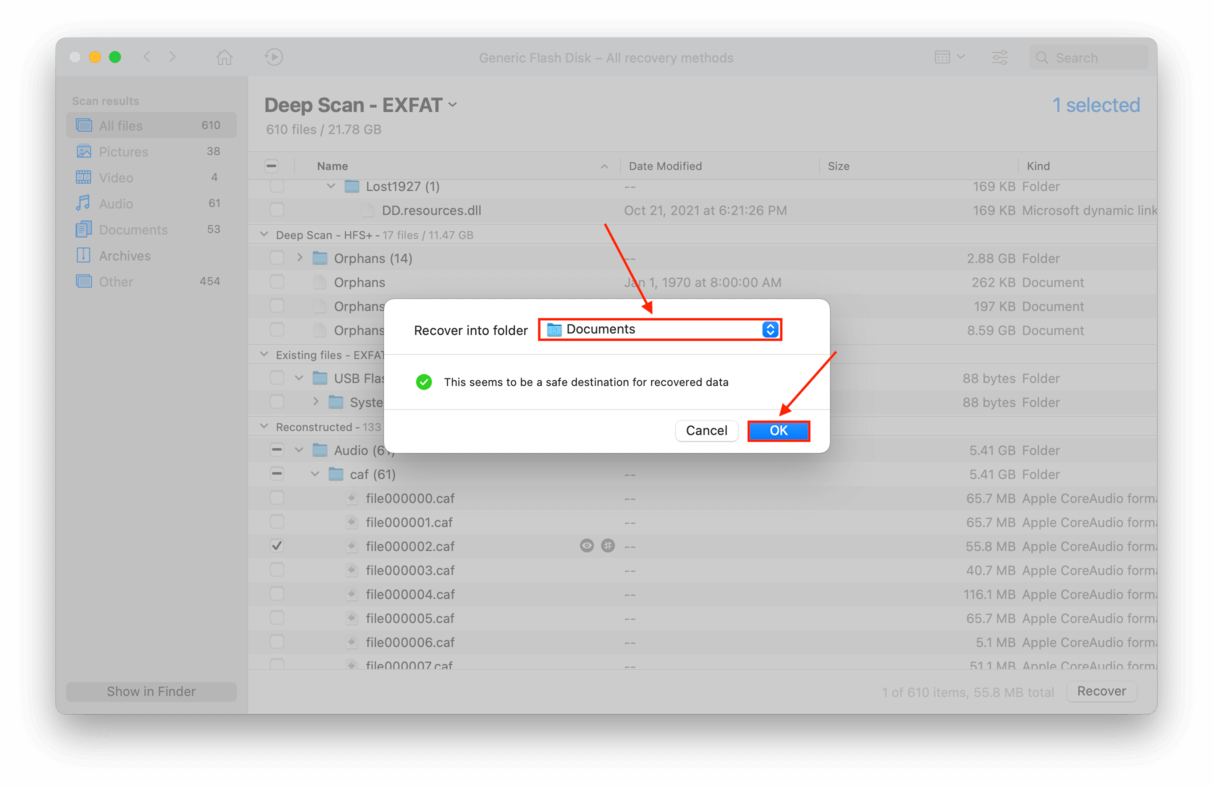
- On the dialogue box that pops up, use the dropdown menu to select a location on your computer where Disk Drill will recover your files (saving it to your USB flash drive may overwrite existing data). Then, click “OK.”

Disk Drill can be a lifesaver in situations where you cannot access files due to disk corruption or damage. It can also recover files that have been accidentally deleted or from a disk that was inadvertently formatted. It is definitely worth checking out when faced with the prospect of irretrievable data on a USB or flash drive.
Conclusion
In most cases, corrupted or internally damaged USB flash drives can be repaired using DIY methods. But always remember – the more you use a corrupted drive, the worse it gets. So make sure to recover and backup your data first! This also makes it easier to pull the trigger and format your USB flash drive, which is usually the most effective and straightforward method to fix a problematic flash drive.
Windows
Preliminary Checks
- Check That Your USB Device Is On. When you connect your USB stick to your computer, it should ideally turn on automatically with flashing lights on the unit indicating activity. Some units have a dedicated power cable, or physical power button that you have to turn on manually, for your computer to detect it.
- Examine The USB Stick For Cracks. It’s possible that the flash drive could have been damaged without your knowledge, so check it physically to rule out any issues before trying again.
- Restart Your Computer. This may be an old tech support standby, but it fixes a lot of issues, especially those caused by software glitches. Unplug the USB stick, shut down your computer and unplug it from the power source. Wait up to one minute before restarting your computer and trying the flash drive again.
- Allow Your Computer To Load Fully before trying the USB stick again. Some computers can be slow and get overwhelmed by the multiple operations they have to run during startup, so it’s possible that your USB stick might be getting overlooked.
Check For Device Compatibility
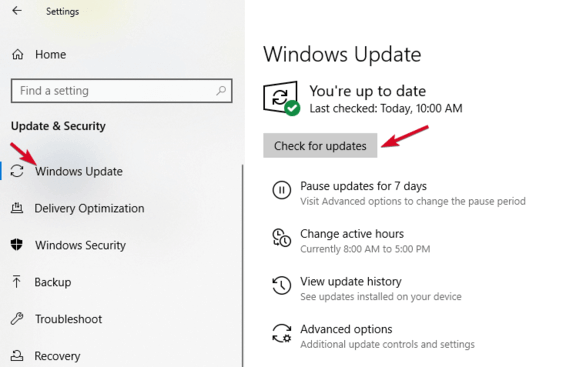
Update Your Operating System
If you’re using Windows, updating the operating system comes with important files that support different hardware and devices, plus fixes to any errors you may encounter.
- Open Settings > Update & Security.
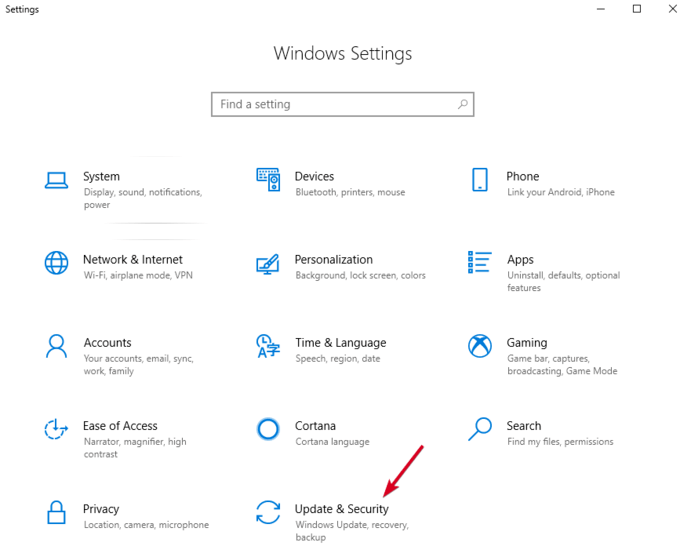
- Click Check for Updates. If there are any pending updates, download and restart your computer before trying your USB stick again.
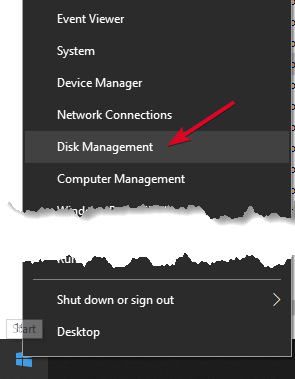
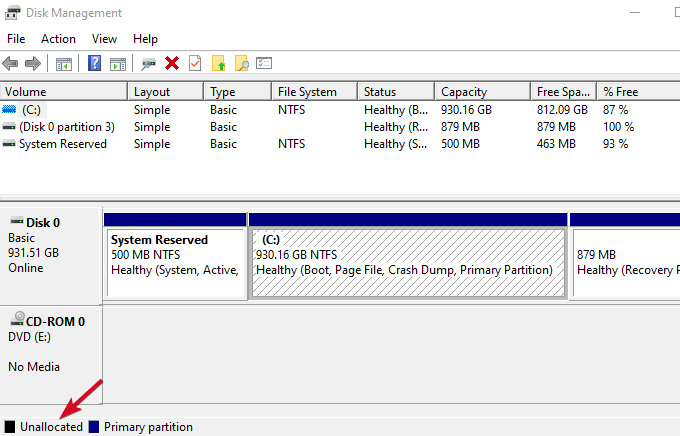
Use Disk Management Tool
This tool checks whether Windows will detect your USB stick. It also shows you all the hard disks connected to your PC, and you can review information like partitions, sizes, and more.
- Plug in your USB stick and right-click Start > Disk Management.
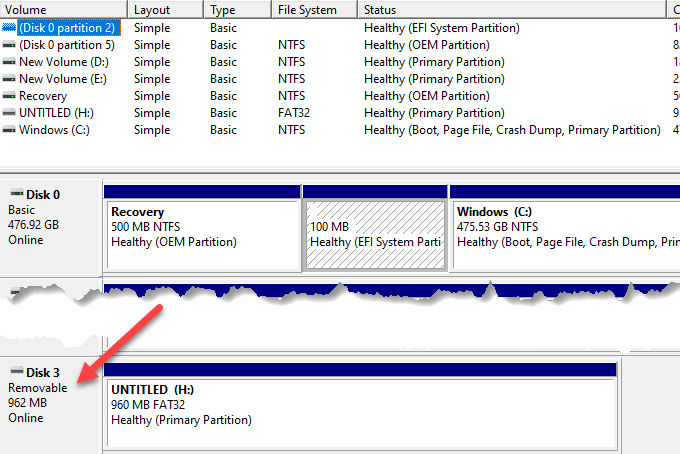
- Check for your USB stick under primary or secondary disks. If it doesn’t contain partitions, it’ll appear as Removable.
- If you see it in the Disk Management utility, you can create a new volume and assign a drive letter. This way, you can partition or format the flash drive to make it easily detectable by other devices, including your PC.
- If your USB drive is not showing up, it could be a driver or hardware issue, or the drive is dead.
Try Plugging Into a Different Computer Or USB Port
Unplug the USB stick from the current port and computer, and try plugging into a different computer and/or USB port. If it works on the new USB port or computer, the USB port may be damaged or dead, or the computer itself may have a problem.
A faulty, damaged or dead USB port presents problems such as failure to detect USB drives or displays error messages. Check if the port is clean, dust-free, and firm. If it’s moving up and down or feels loose, then it’s faulty/damaged.
If you’re using a USB hub, unplug the stick from the hub and plug it directly into your computer. Some hubs have insufficient power for external drives to function, which may be the case with yours.
If the USB drive isn’t showing up even after trying a different port, computer, or checking in Disk Management, the drive is probably dead and needs to be replaced.
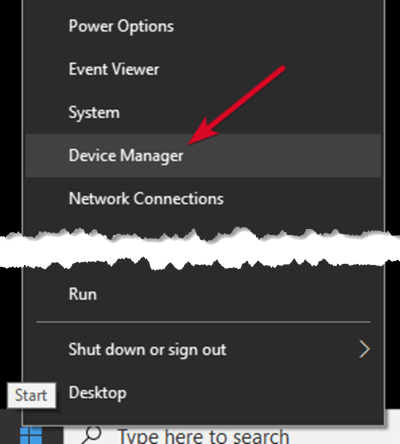
Troubleshoot Drivers
You can troubleshoot driver issues using Device Manager, especially if your USB stick is detected by a different computer other than the one you’re using, signaling a driver problem.
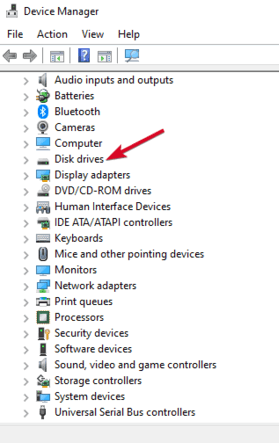
- Right-click Start>Device Manager.
- Expand Disk drives and check for a yellow exclamation point next to any of the listed devices. If there’s one or more with this mark, then the device(s) has a driver issue.
- Right-click on the problematic device and select Properties to see the related error message. You can search for the error online to find a solution to the problem
You can also try the following solutions to resolve driver issues:
- Roll back the driver to revert to recent driver updates and restore the device back to a time when it was functioning properly.
- Download drivers from the device manufacturer’s site from the downloads page, support page, or by searching on the site for the right driver.
- Update the driver by right-clicking on the driver in Device Manager, select Update driver and follow the prompts.
- Uninstall the device from your computer, restart it and wait for it to reinstall the right driver and configurations.
Use Device Manager To scan For Hardware Changes
- Right-click Start and select Device Manager.
- Click Action > Scan for hardware changes.
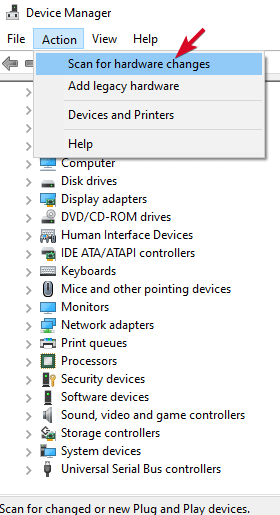
Windows will try to find your USB stick so you can access it again.
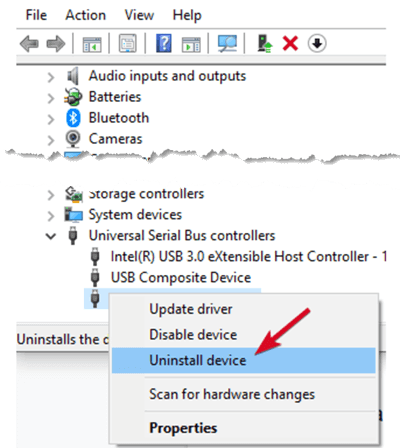
Reinstall USB Controllers
This method helps where the USB driver is unstable or corrupted.
- Right-click Start>Device Manager and click on the Universal Serial Bus controllers to expand the list.

- Right-click your device and click Uninstall, and then restart your computer to reinstall the controllers automatically.
Create a New Drive Volume & Assign a Drive Letter
If your device appeared in the Disk Management step, you can create a new drive volume and assign a drive letter. The Disk Management tool fixes partitioning and file system problems with different drives.
However, your USB stick may show only Unallocated space, in which case you’ll have to create a new partition so that Windows and other operating systems can use it.
- Right-click Start>Disk Management, right-click on the Unallocated space>New Simple Volume and follow the prompts to create a partition.
If you still can’t see your flash drive, yet it’s partitioned, make sure it has a drive letter. Ideally, this should be automatic, but if you removed it manually, the drive won’t be detected or accessed in Windows.
- Right-click the drive’s partition and click Change Drive Letter and Paths.
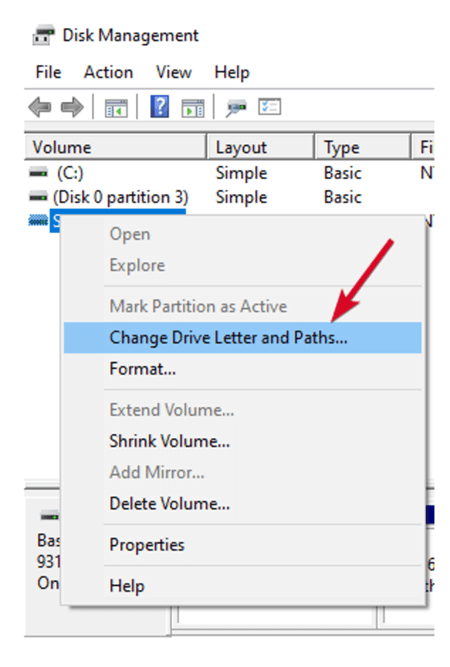
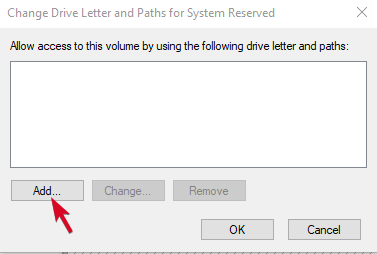
- If it doesn’t have an assigned drive letter, click Add and pick a letter. If it has a letter, click Change and choose a different one.
Disable USB Selective Suspend Feature
This is a power-saving setting that helps reduce battery use by cutting power to your USB stick when it’s plugged in. To ensure your drive isn’t powering down for any reason, disable this feature so that power management settings don’t override the USB controller, which makes Windows not detect it.
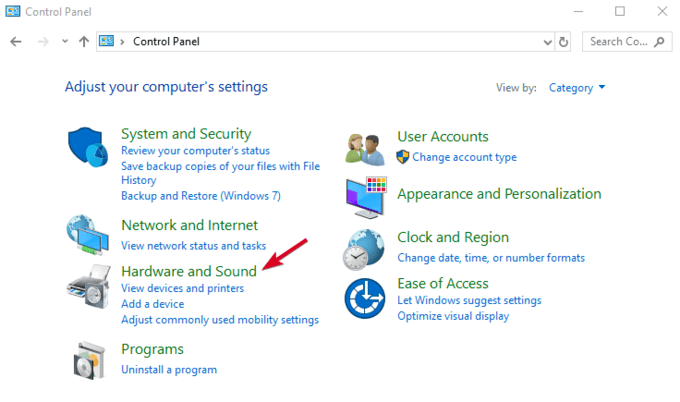
- Click Start>Control Panel and select Hardware and Sound.
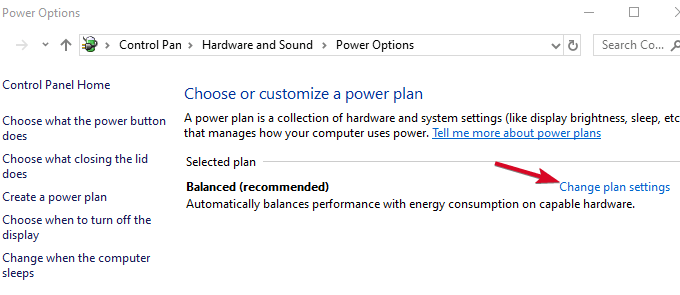
- Click Power Options>Change plan settings.
- Click Change advanced power settings.
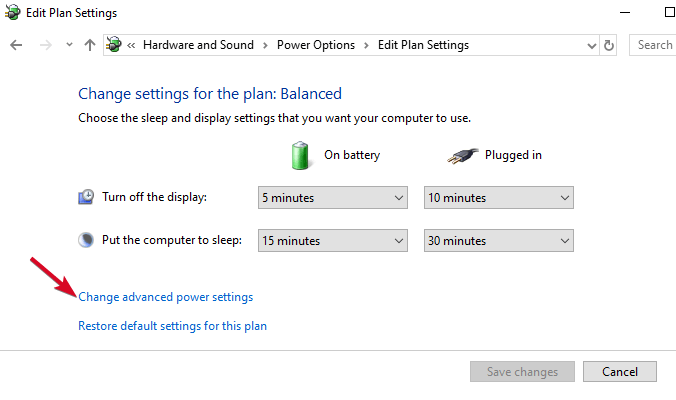
- Go to USB settings and expand it.
- Click USB selecting suspend settings and change the Plugged in drop-down menu to Disabled (Note: If you’re using a laptop, click On battery and change to Disabled in the drop-down menu).
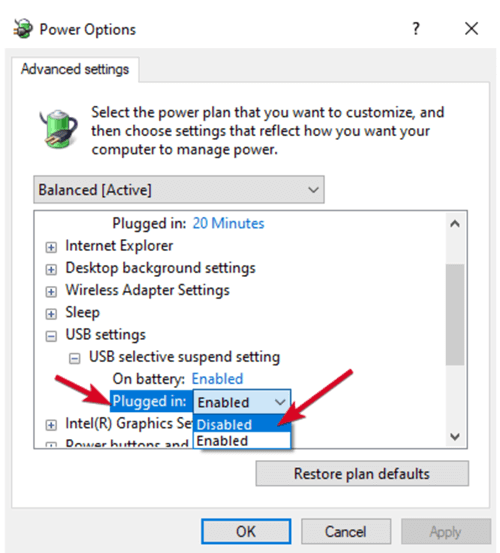
- Click Apply>OK and restart your computer to effect the changes.
If all else fails, you can replace your USB stick as a last resort method, though you can do this if the drive is already broken. Otherwise, we hope this guide has helped ease the process, and you now know what to do when your USB drive isn’t showing up when you plug it in.
External Websites/Sources [Links Below] [Add Dates]
Related Articles
Battery Won't Charge (Laptop/Desktop)
Issue [Battery Won't Charge (Laptop) ] Devices [Laptop, MacOS, Windows] Suggested Resolutions [See Steps Below] Windows 10: Step 1: Run Windows 10 Battery Diagnostics If your battery isn’t fully charging, the first thing you can try is the Battery ...Windows Won't Boot
Issue [Windows Won't Boot] Devices [Laptop, Desktop, Windows] Suggested Resolutions [See Steps Below] Windows 10: Step 1: Check the Power Supply When pressing the power button on your PC, the fans spin up, indicator lights on the keyboard and ...Computer Running Slow (Windows)
Issue [Computer Running Slow (Windows) ] Devices [Laptop, Desktop] Suggested Resolutions [See Steps Below] Windows 11 & 10 If your PC is running slowly, the following suggestions might help speed things up. The tips are listed in order, so start with ...Computer Screen Frozen
Issue [Computer Screen Frozen] Devices [Laptop, Desktop, Windows, MacOS] Suggested Resolutions [See Steps Below] Windows 10 + 11: Step 1: Check if Your Computer is Deadlocked or Not Tap the Num button on your keyboard. If the light on your keyboard ...Data Recovery (Windows)
Issue [Data Recovery (Windows) ] Devices [Laptop, Desktop, Windows] Suggested Resolutions [See Steps Below] Windows 10 Do You Know Microsoft’s Windows File Recovery Tool? When you delete or lose some important files on your Windows 10 computer, the ...