Issue [Windows Won't Boot]
Devices [Laptop, Desktop, Windows]
Suggested Resolutions [See Steps Below]
Windows 10:
Step 1: Check the Power Supply
When pressing the power button on your PC, the fans spin up, indicator lights on the keyboard and computer light up, the internal hard drive starts spinning and some other sounds can be heard. If you don’t hear any of the sounds, the computer is likely to not get any power.
To fix the boot issue, the first step you can try is to disconnect the power cable from your computer and reconnect it correctly. You can also connect the power cable to a wall outlet. If you are using a laptop, you can let it charge for several hours.
Step 2: Check the Monitor and Disconnect all Peripheral Devices
If the computer powers up but nothing is on the monitor, perhaps the monitor goes wrong. Also, try disconnecting the power cable and plugging it back. Make sure the connection is solid. If this won’t work, try another monitor.
You can disconnect all the devices (except for mouse and keyboard) that are plugged into your computer, including printers, external hard drives, webcams, scanners, etc. Then, restart the PC to see if it can boot properly. If so, reconnect one device at a time and reboot Windows to eliminate the problematic device.
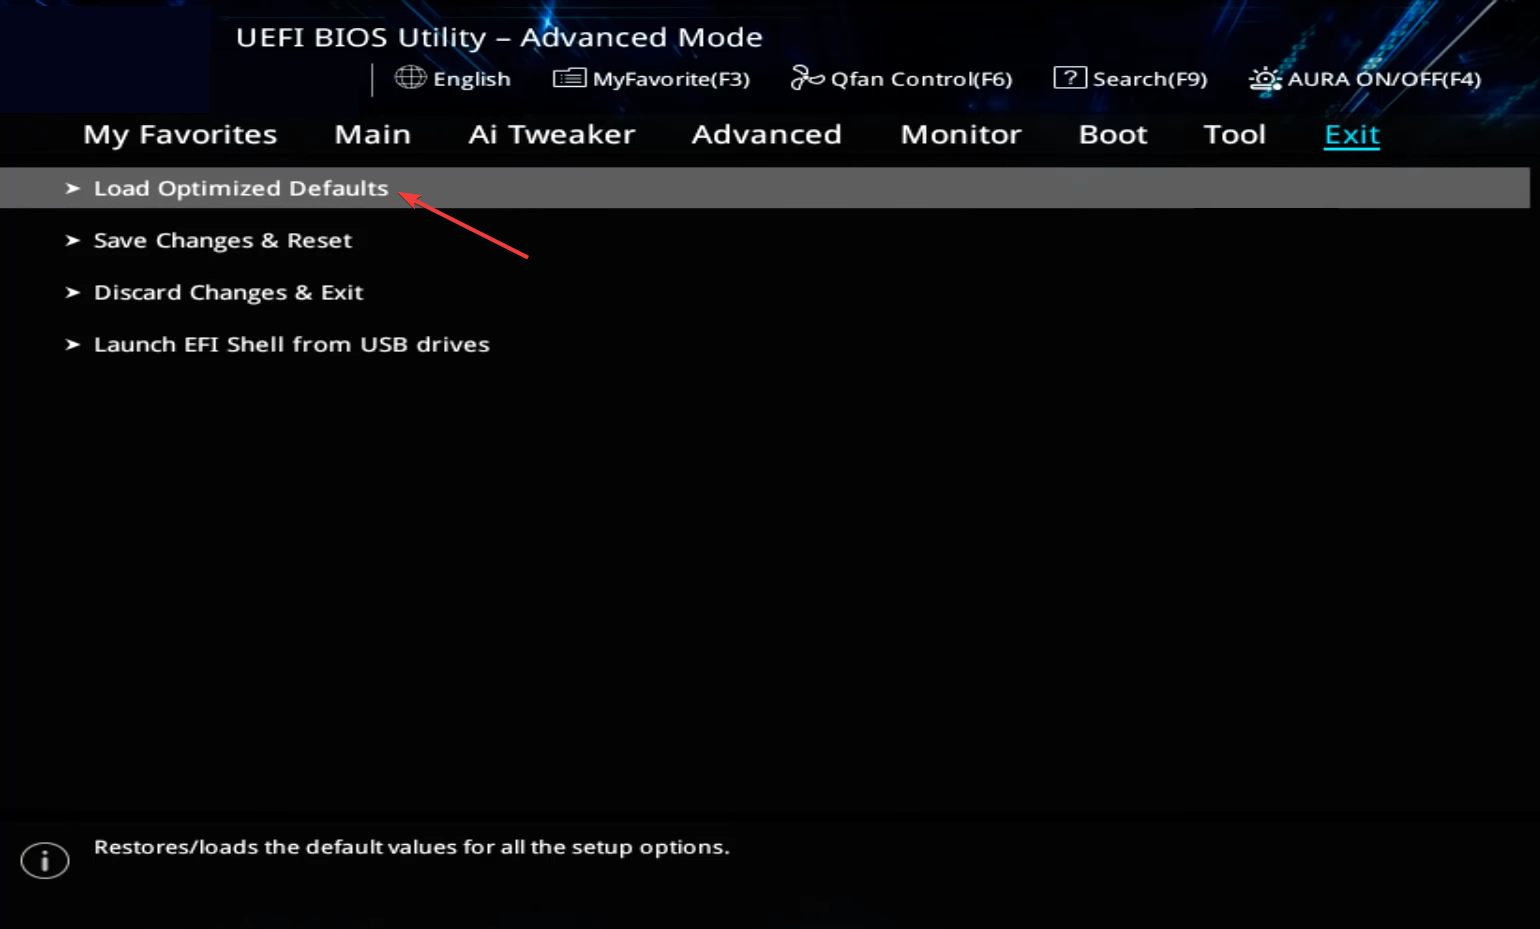
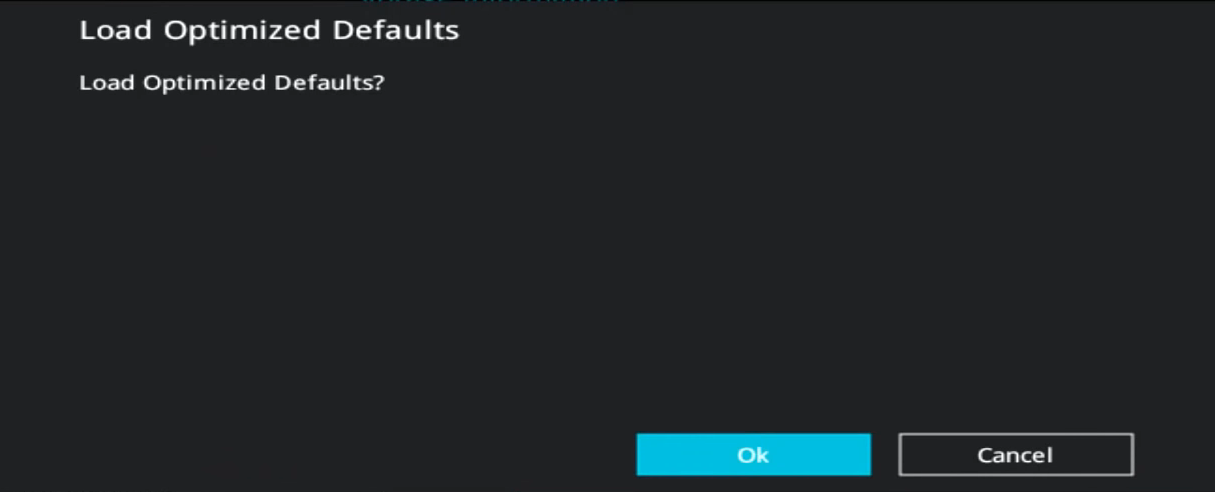
Step 3: Reset the BIOS
- Turn on the computer and repeatedly hit the F1, F10, F12, or Esc key to access the BIOS, depending on the manufacturer.
- Look through the various tabs here to locate the Load Optimized Defaults, Load Default Options, or the Load System Defaults option, and select it.
3. Click OK to confirm the change.
Note: Oftentimes, a change to the BIOS can lead to a situation when Windows 10 won’t boot. And instead of spending a whole lot of time identifying it, resetting the BIOS should quickly do the job.
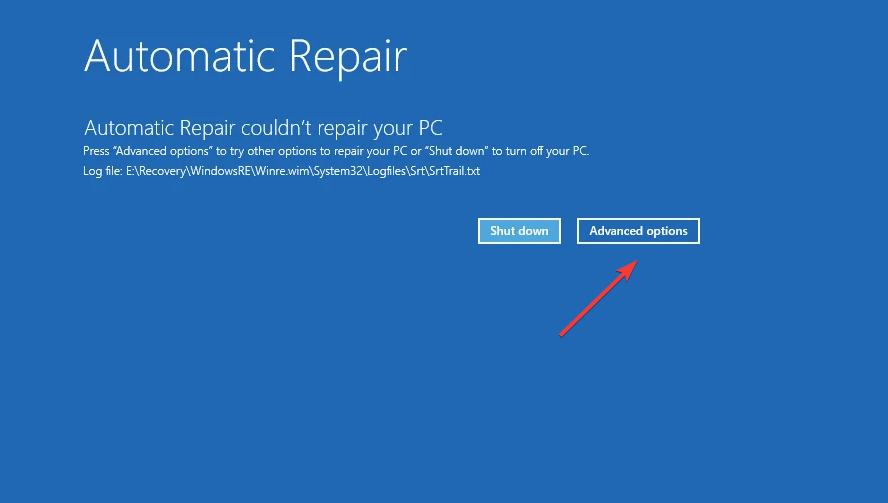
Note: Many solutions here require accessing the Windows RE(Recovery Environment). If it doesn't appear on your PC, you may need to create a bootable USB and then access the recovery options shown below
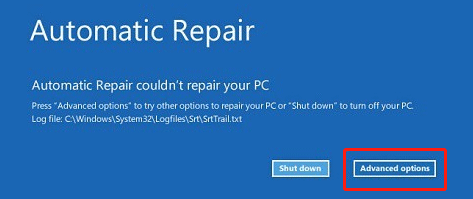
- Turn on the PC, and as soon as the display lights up, hold the power button to turn it off. Repeat the process twice, and on the third attempt, the computer will run Automatic Repair.
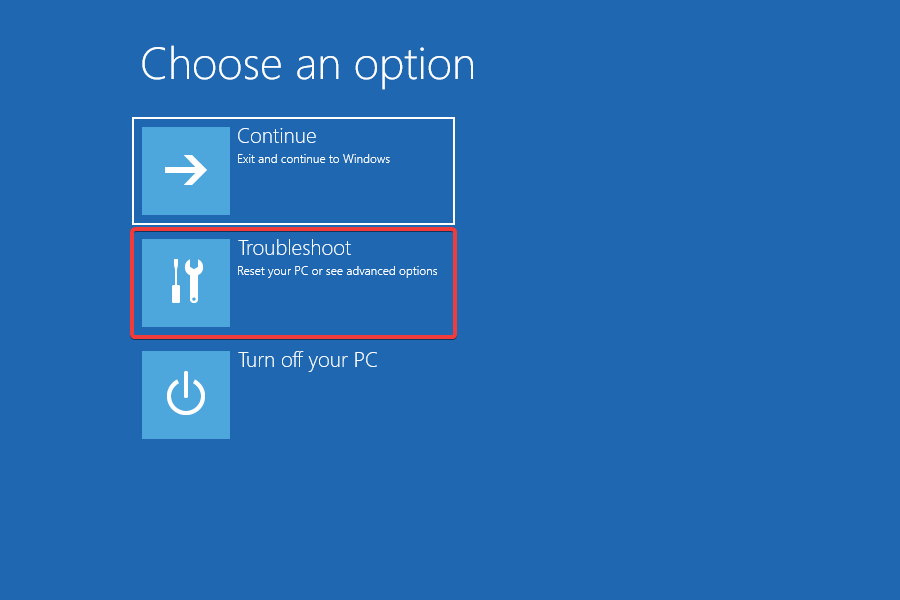
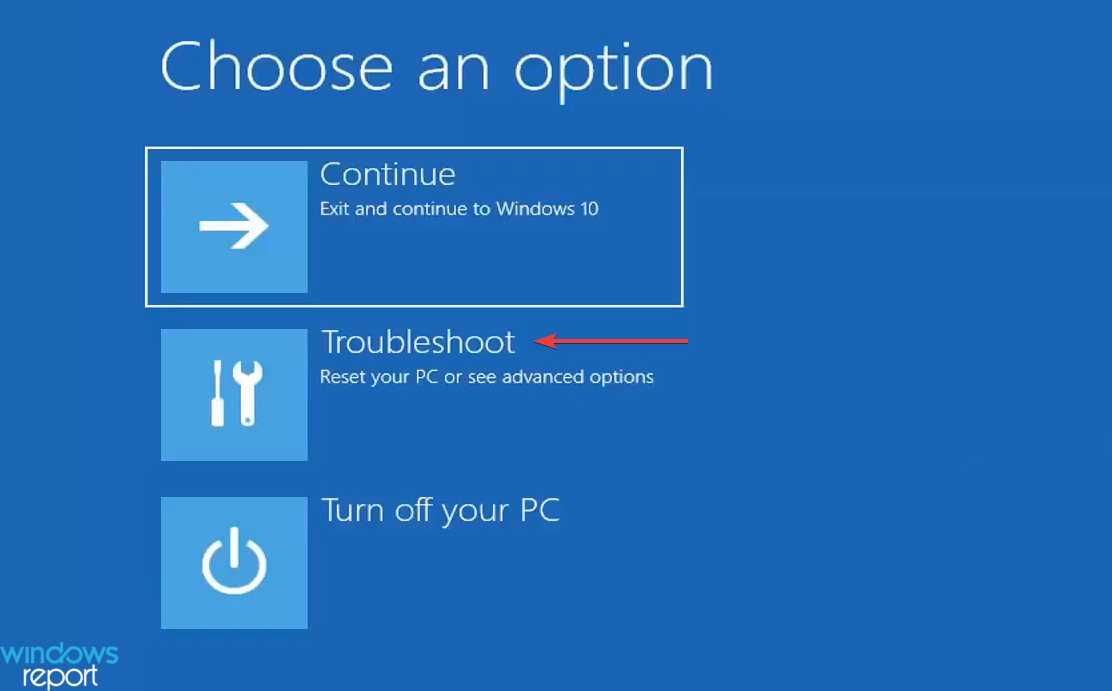
- Once the test is done running, click on Advanced options to proceed
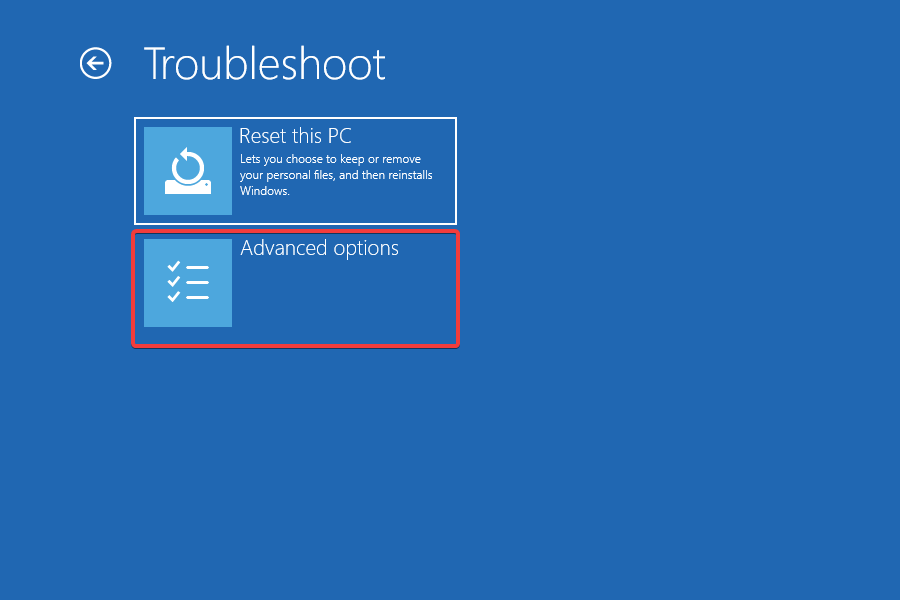
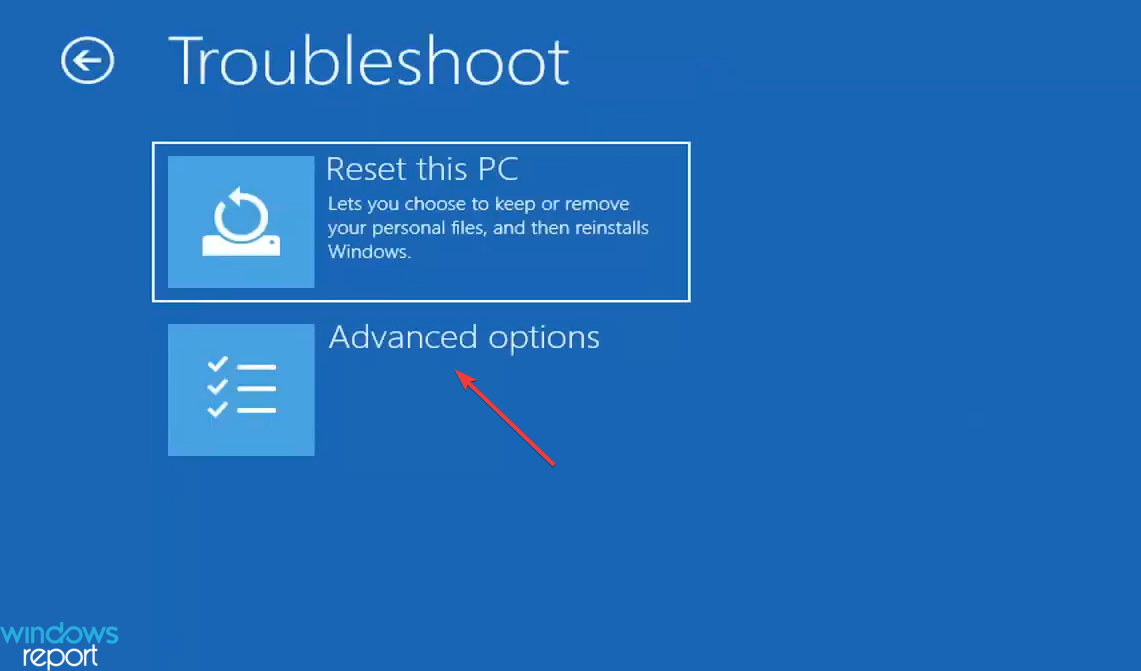
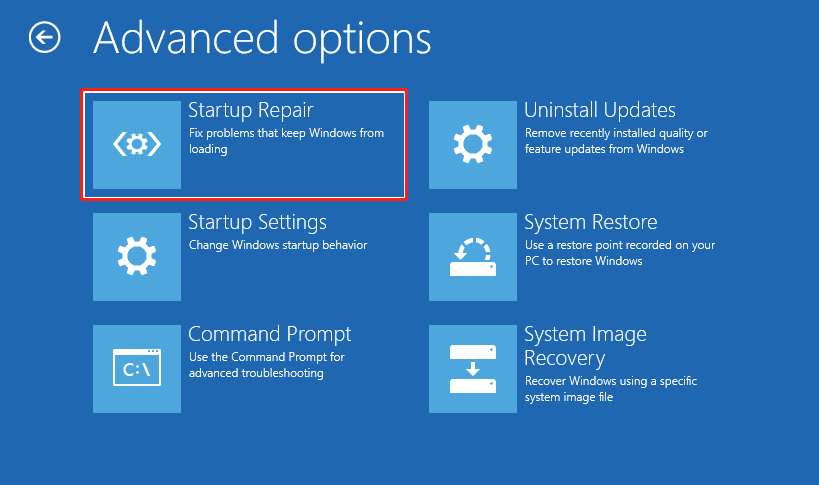
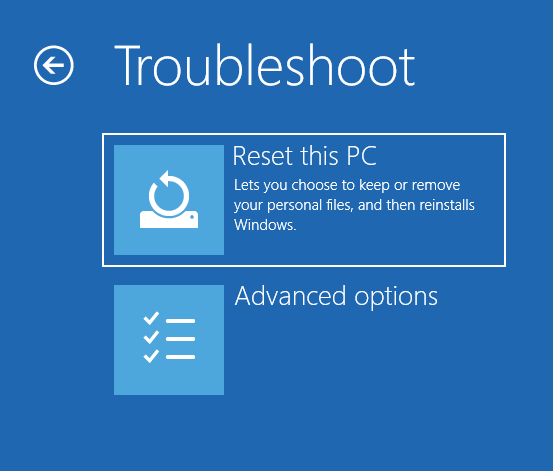
3. Choose Troubleshoot.
4. Again, click on Advanced options.
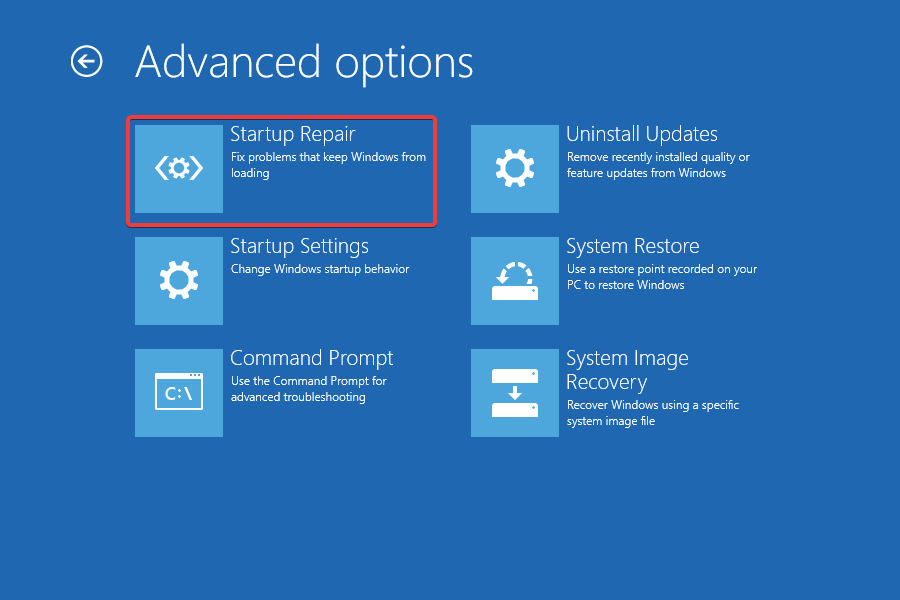
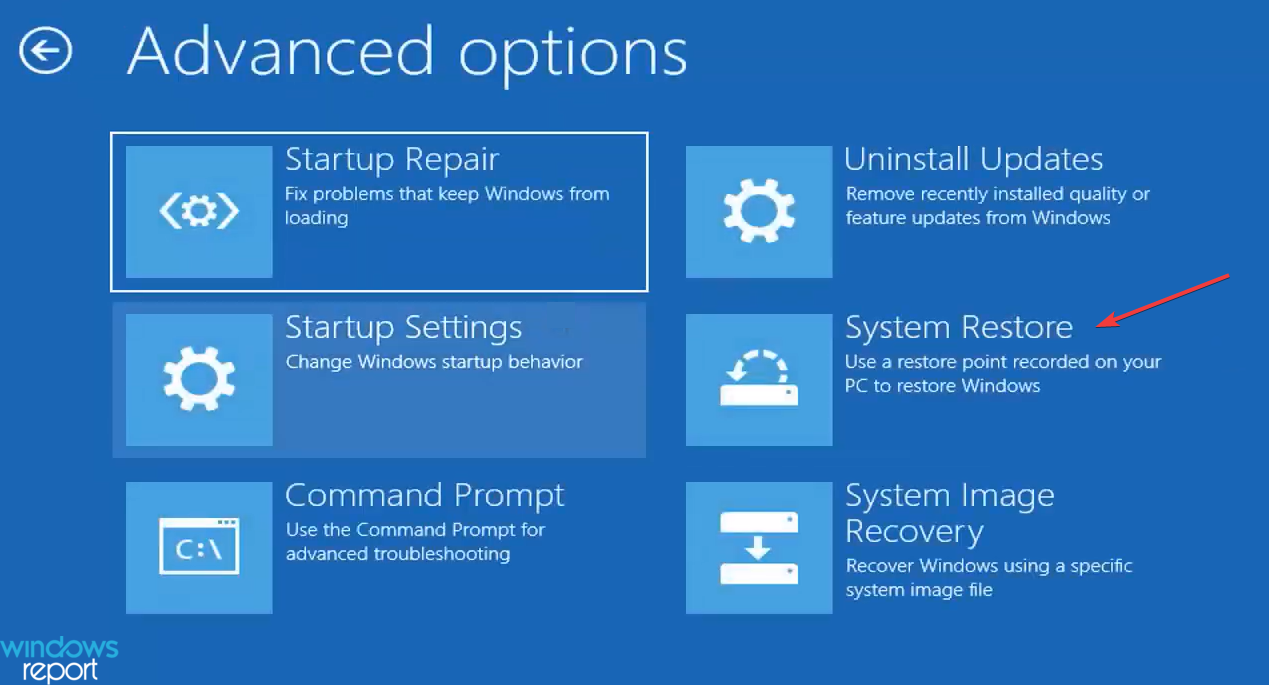
5. Now, select Startup Repair from the six entries here
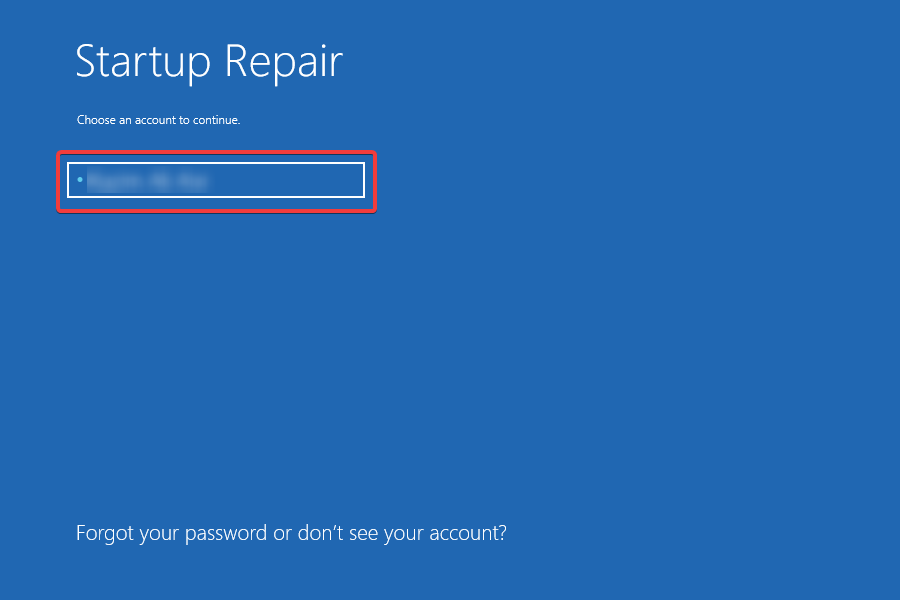
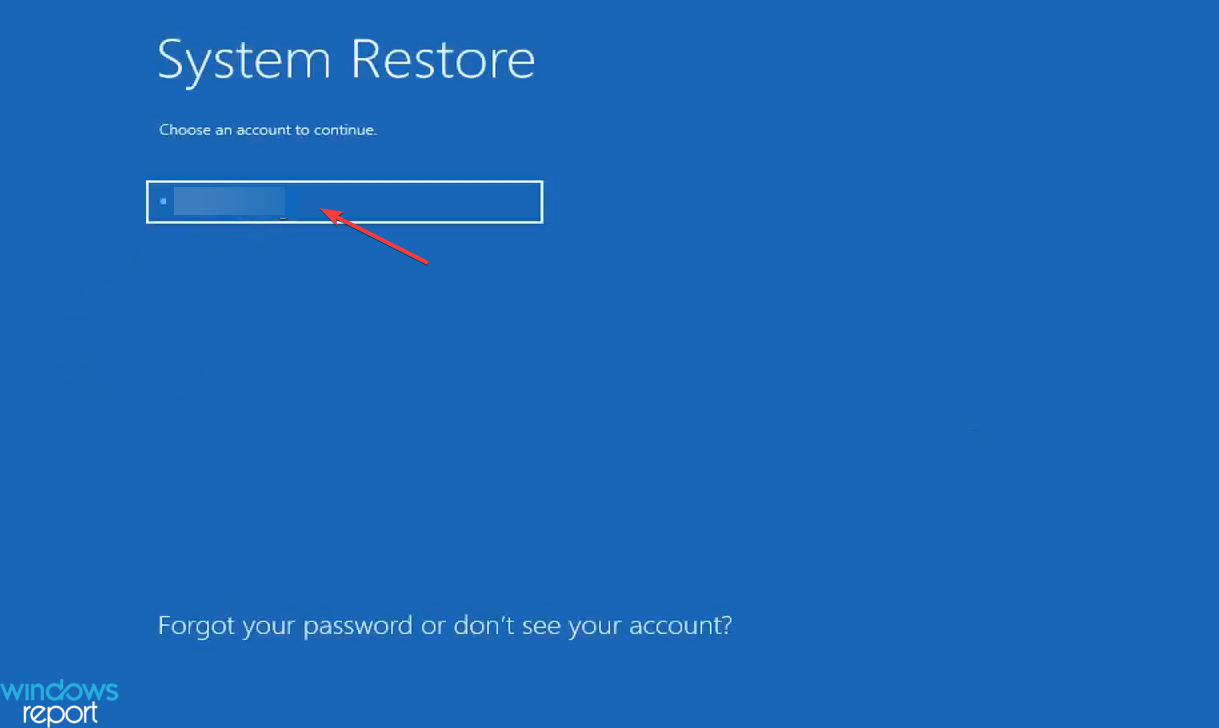
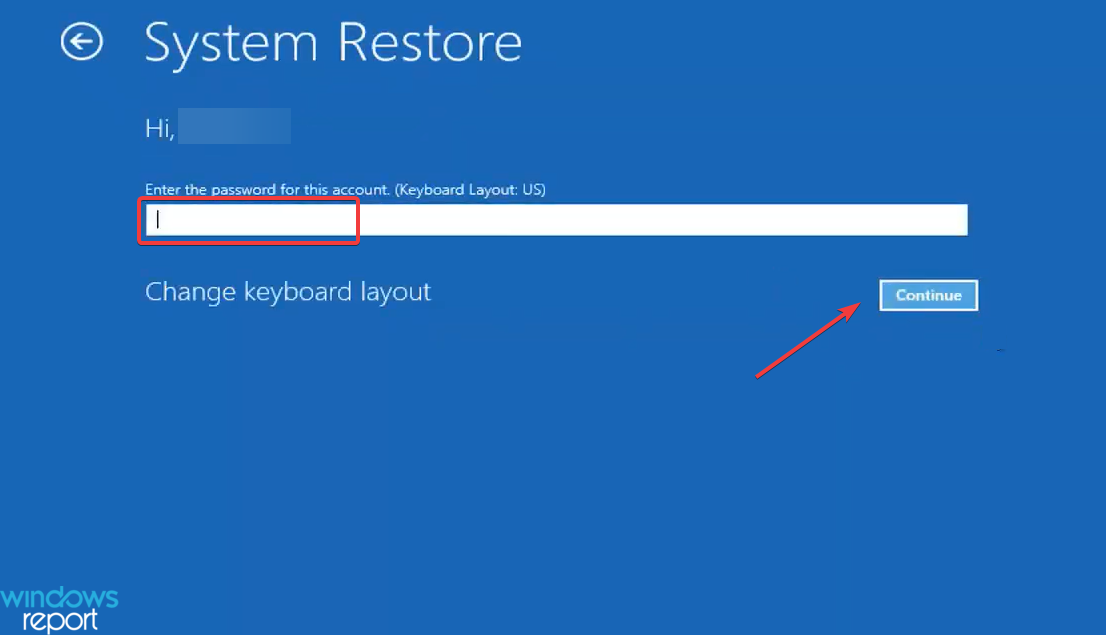
6. Choose an account to continue.
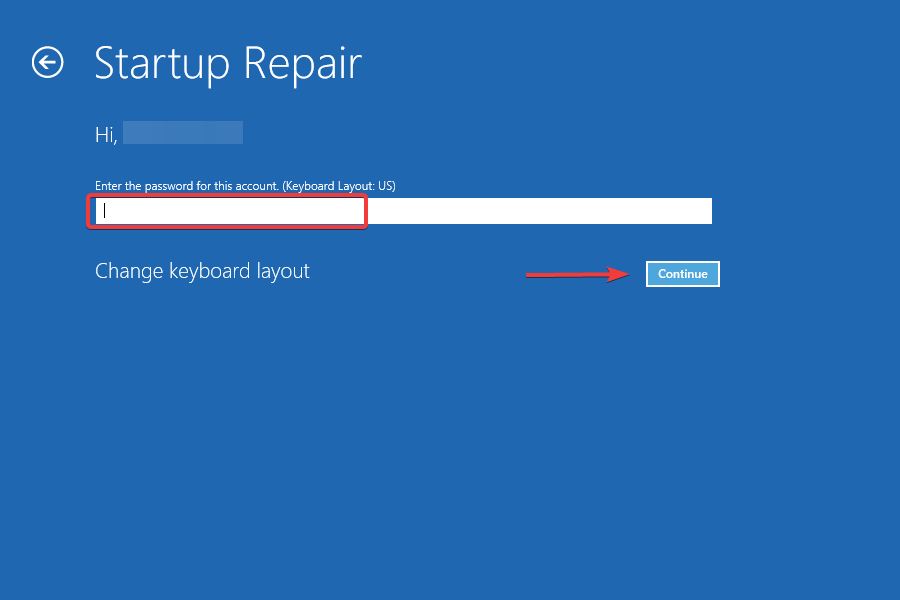
7. Enter the password for the account if you have set one, and click on Continue to proceed.
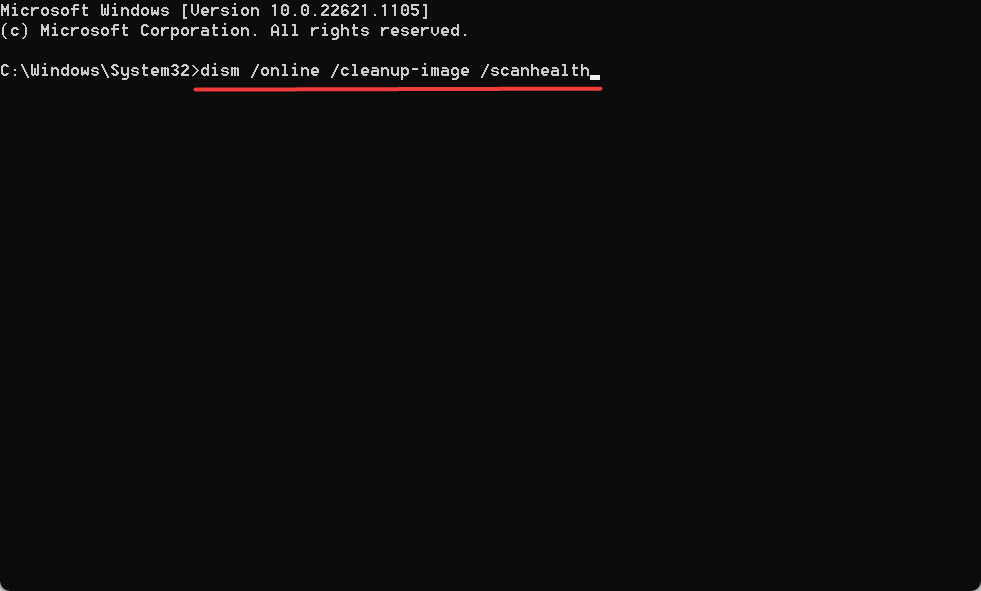
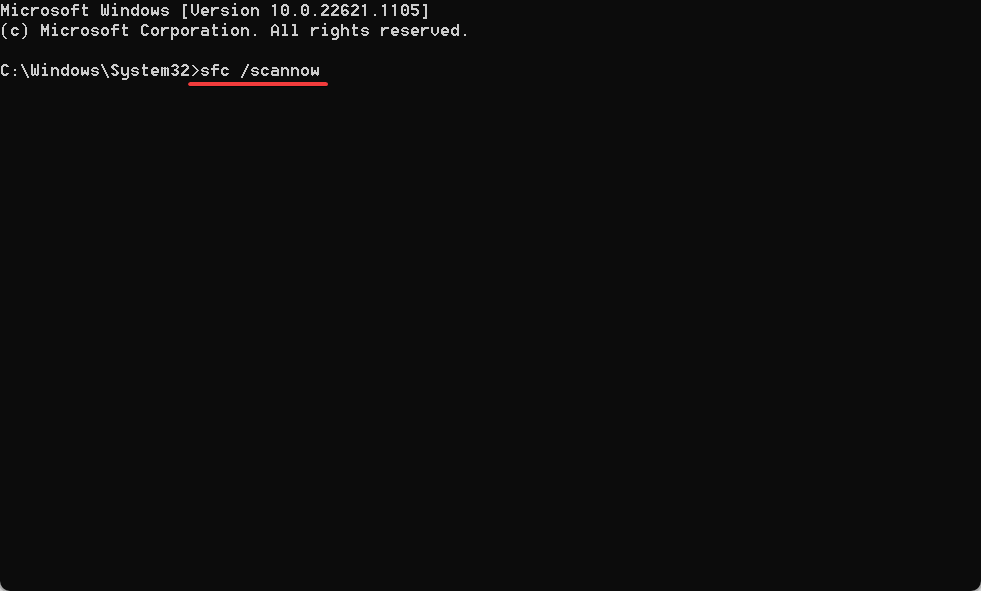
Step 5: Run the DISM and SFC Scan
1. Access Recovery Mode in Windows 10, and choose Command Prompt from the list of options.
2. Now, paste the following commands one at a time, and hit Enter after each
DISM /Online /Cleanup-Image /ScanHealth
DISM /Online /Cleanup-Image /RestoreHealth
3. Next, execute the following command to run the SFC scan:
Running the DISM tool and SFC scan helps fix corrupt system files, one of the reasons Windows 10 won’t boot on your PC. Once done, check if Windows now boots properly.
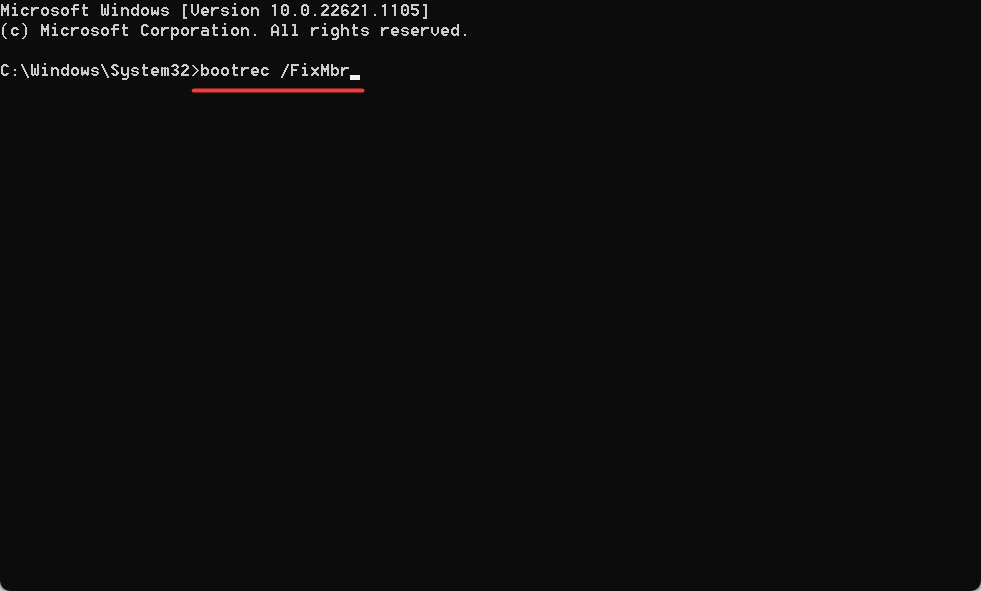
Step 6: Repair the Master Boot Record (MBR):
1. Choose Command Prompt in the Windows RE (Recovery Environment)
2. Now, execute the following commands individually
bootrec /FixMbr
bootrec /FixBoot
bootrec /ScanOs
bootrec /RebuildBcd
MBR or Master Boot Record is largely responsible for loading Windows, and when there are issues with it, you might encounter such problems. In this case, it’s recommended that you repair and rebuild the MBR to get things running
How to Create a Bootable USB Flash Drive with Windows 10 Downloaded
Step 1: Format the drive and set the primary partition as active
Connect the USB flash drive to your technician PC.
Open Disk Management: Right-click on Start and choose Disk Management.
Format the partition: Right-click the USB drive partition and choose Format. Select the FAT32 file system to be able to boot either BIOS-based or UEFI-based PCs.
4. Set the partition as active: Right-click the USB drive partition and click Mark Partition as Active.
Step 2: Copy Windows Setup to the USB Flash Drive
Use File Explorer to copy and paste the entire contents of the Windows product DVD or ISO to the USB flash drive.
Note: Download Windows 10 Link Attached At the End of Article
Step 7: Use System Restore
Note: You will have to download Windows 10 on a USB Drive. To do this, follow the steps listed above.
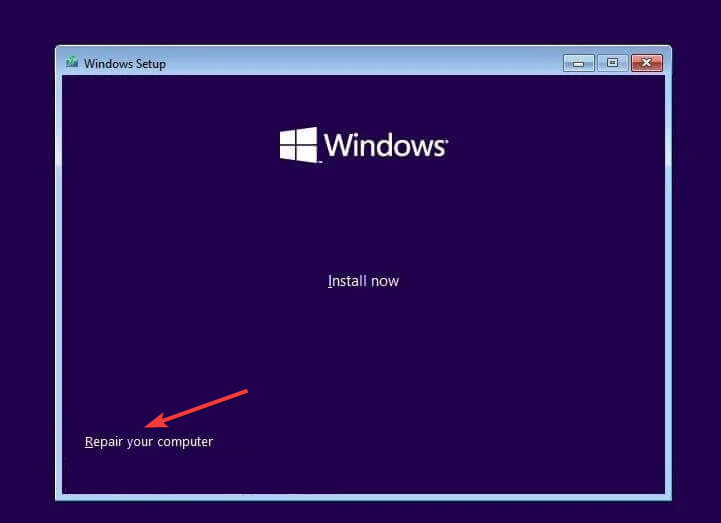
1. Plug in the Windows 10 bootable USB drive, get the PC to boot via it, and then run the setup.
2. Choose the appropriate response on the initial setup screens until you get to the one that says, Repair your computer, and then click on it.
3. Now, choose Troubleshoot.
4. Click on Advanced options.
5. Select System Restore.
6. Choose your account to proceed.
7. Enter the password for the account, and click Continue
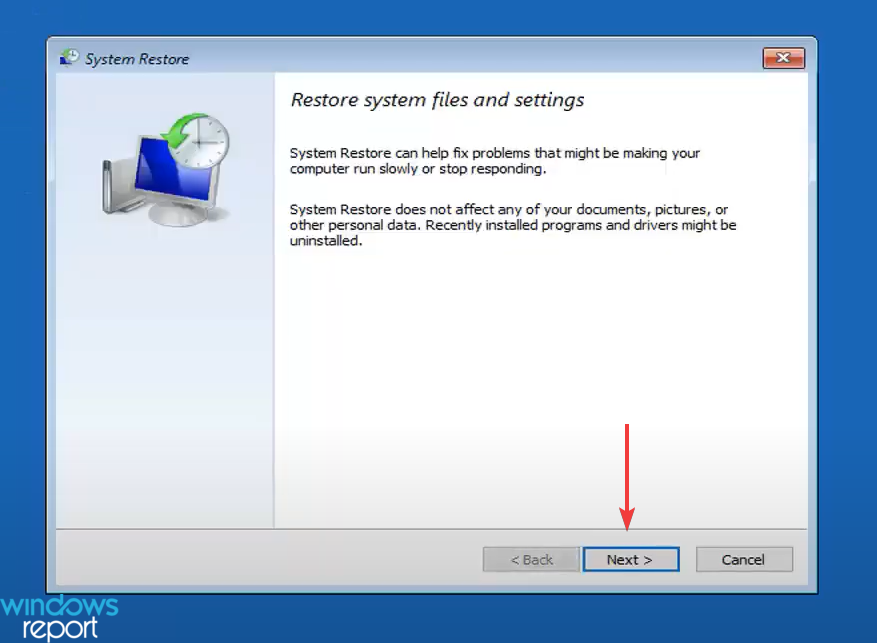
8. Click on Next.
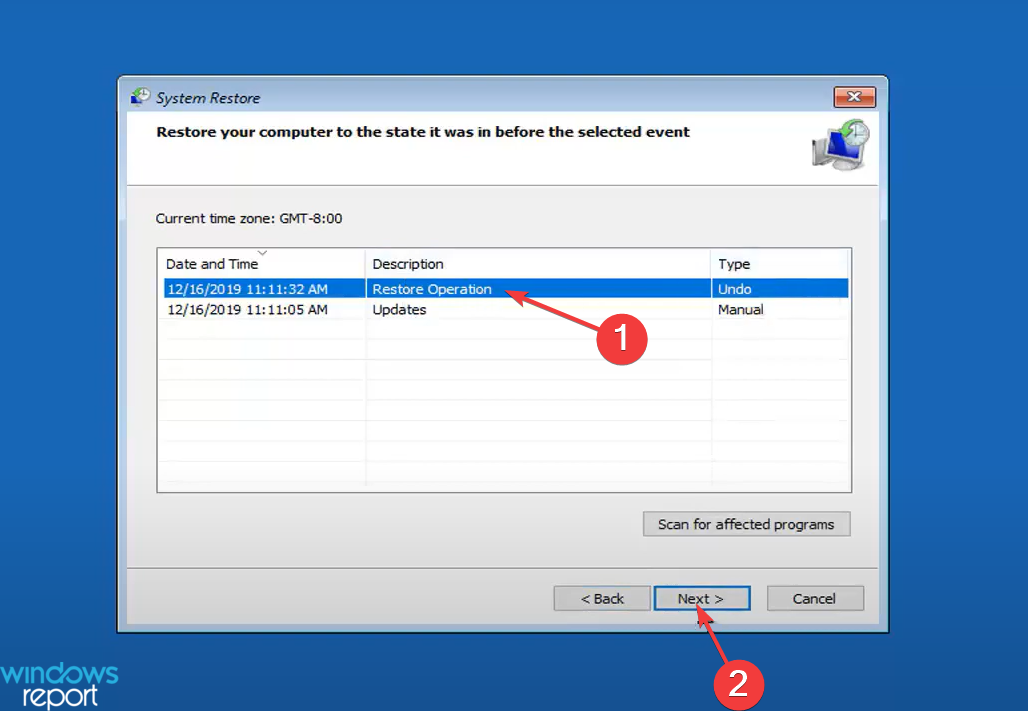
9. Now, select a restore point from the list, and again click Next.
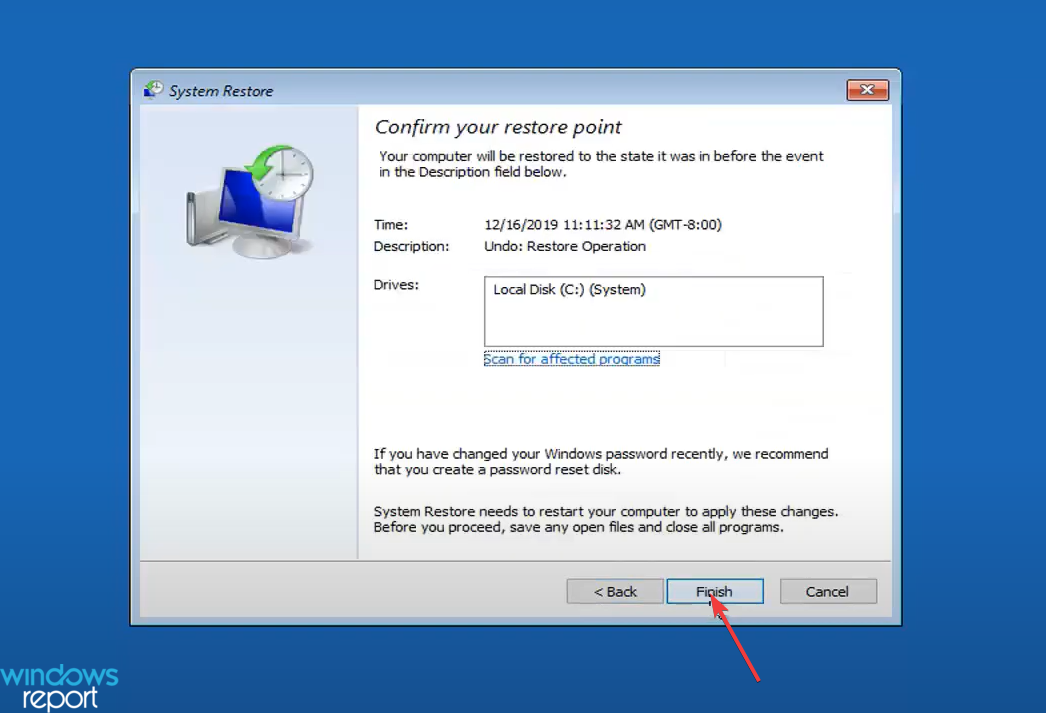
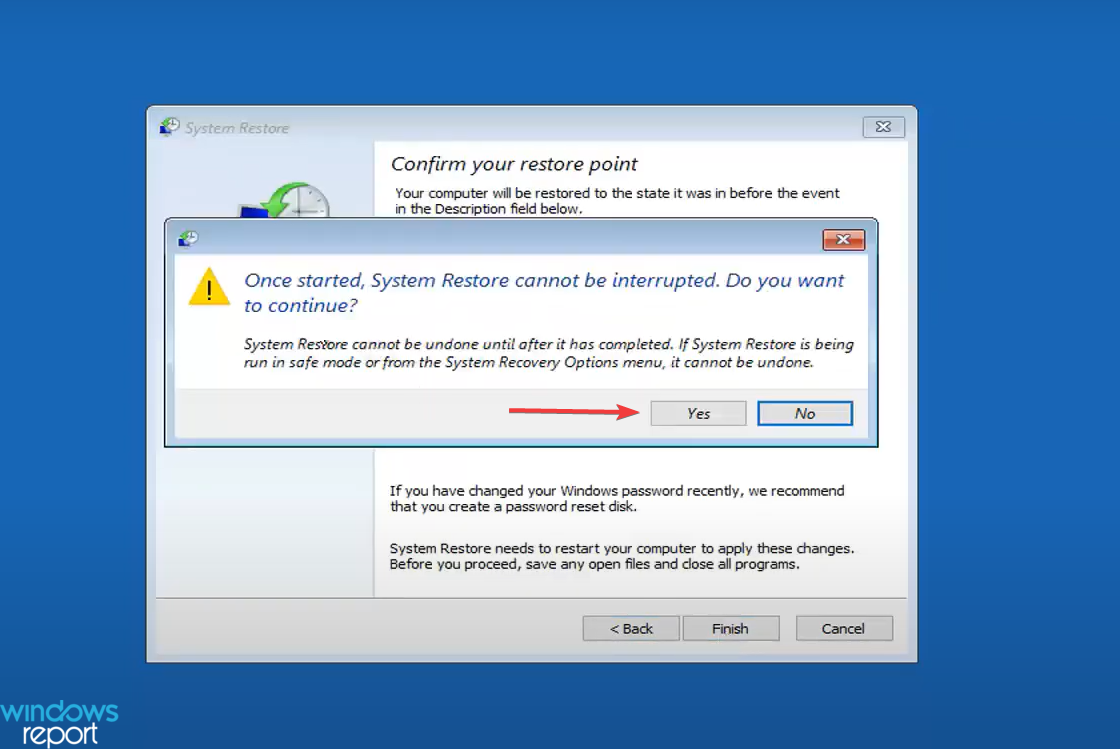
10. Verify the restore details, and click on Finish to start the process.
11. Click Yes to confirm.
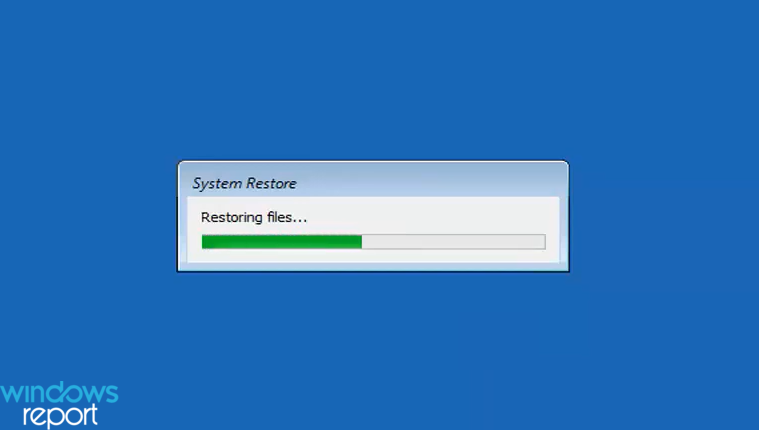
12. Finally, wait for the restore to complete.
If the solutions listed previously didn’t work, you could always perform a system restore to take your PC back to a state where the error didn’t exist. It’s for situations like these that we recommend creating restore points regularly.
Step 8: Reinstall Windows 10.
1. To completely reinstall Windows 10, you will need to create a bootable USB drive. Refer back to the section: How to Create a Bootable USB Flash Drive
2. Place the USB stick inside the Windows device.
3. Now with the USB stick plugged in, you will need to reboot your operating system.
4. After the device starts it will automatically get you to a "Windows Setup" window.
5. Tap on the "Next" button to proceed.
6. In the next screen, click on the "Install Now" button situated in the middle of the screen.
7. In the “Which type of installation you want?” screen left-click or tap on the “Custom: Install Windows only (Advanced)”
8. Now in the “Where do you want to install Windows?” screen, you can choose the same directory as you used before or create a separate partition for this Windows only.
9. Left click or tap on the “Next” button to proceed with the installation.
Note: The process will take up to half an hour depending on the device you have.
10. Your device will reboot after the installation process has finished.
11. You should now have the “Settings” screen in front of you
12. Left click or tap on the “Use Express Settings” button situated in the lower side of the window.
13. After the process above you will get to a “Sign in to your Microsoft account” screen in which you will need to write your Microsoft information.
14. Left click or tap on the “Next” button after you are done in this window.
15. Next, you will get to a “How should we set up your PC?” window.
16. Left click or tap to select the “Set this up as a new PC instead” option.
17. Next screen will be “OneDrive is our cloud storage” in which you need to left click or tap on the “Next” button.
18. Wait a couple of minutes more for your apps to get installed properly.
19. And voila, you are in your Windows 10 Technical Preview once more.
Windows 11:
Step 1: Check the Power Supply
When pressing the power button on your PC, the fans spin up, indicator lights on the keyboard and computer light up, the internal hard drive starts spinning and some other sounds can be heard. If you don’t hear any of the sounds, the computer is likely to not get any power.
To fix the boot issue, the first step you can try is to disconnect the power cable from your computer and reconnect it correctly. You can also connect the power cable to a wall outlet. If you are using a laptop, you can let it charge for several hours.
Step 2: Check the Monitor and Disconnect Peripheral Devices
If the computer powers up but nothing is on the monitor, perhaps the monitor goes wrong. Also, try disconnecting the power cable and plugging it back. Make sure the connection is solid. If this won’t work, try another monitor.
You can disconnect all the devices (except for mouse and keyboard) that are plugged into your computer, including printers, external hard drives, webcams, scanners, etc. Then, restart the PC to see if it can boot properly. If so, reconnect one device at a time and reboot Windows to eliminate the problematic device.
Step 3: Run Windows Startup Repair
1. Press the Power Button
2. When you see the Windows blue logo, press and hold the Power button again to shut down your computer.
3. Repeat the above steps two more times. Then, you can see your computer is preparing Automatic Repair. After a while, you can see the Automatic Repair interface.
4. Click the Advanced Options button to enter Advanced Startup Options on Windows 11
5. Go to Troubleshoot > Advanced options > Startup Repair. Then, Windows will start diagnosing your computer and fix the boot problem.
Step 4: Use System Restore
1. Restart your PC several times when seeing the Windows logo or boot the PC from an installation USB drive or disc to enter WinRE. (Refer to Step 3)
2. Navigate to Troubleshoot > Advanced options > System Restore.
3. Click Next when the System Restore widget opens.
4. In the pop-up window, you may see the restore points you have created. Choose the most recently created one and click Next to continue.
5. You are asked to confirm the restore point. If everything is OK, click Finish to start the restoration operation.
Step 5: Run Command Prompt
1. Boot the PC to Windows Recovery Environment by following the wizards mentioned above.
2. If you are asked to enter a user account and password, do that.
3. Go to Troubleshoot > Advanced options > Command Prompt to open the CMD window.
4. Perhaps the MBR (Master Boot Record) is corrupted, causing the PC not to boot. So, you should type these commands below and press Enter to fix MBR.
bootrec /fixmbr
bootrec /fixboot
bootrec /rebuildcbd
Type bcdboot c:\Windows /s c: and press Enter. If your system drive is not C, replace C with the correct drive letter.
In addition, you can run the CHKDSK command to check file system errors and perform disk checks. Just type chkdsk n: /f /r and press Enter. Here n means the drive letter of the drive you want to check.
Step 6: Reset or Reinstall Windows 11
1. When Windows 11 fails to boot, go to WinRE. (Refer to Previous Steps on how to enter WinRE)
2. Under the Troubleshoot window, click Reset this PC.
3. Choose the first option in the new pop-up to keep your files. Then, follow the on-screen instructions to finish resetting your Windows PC.
External Websites/Sources
Links Verified on: 4/26/23